

Guest Profile
Open Guest Profile
To open a guest profile:
- Go to Marketing → Guests
- Enter one of the following in the search bar: first name, last name, phone number, email address, or loyalty card number
- Click the required guest in the list to open their profile
Guest Profile Tabs
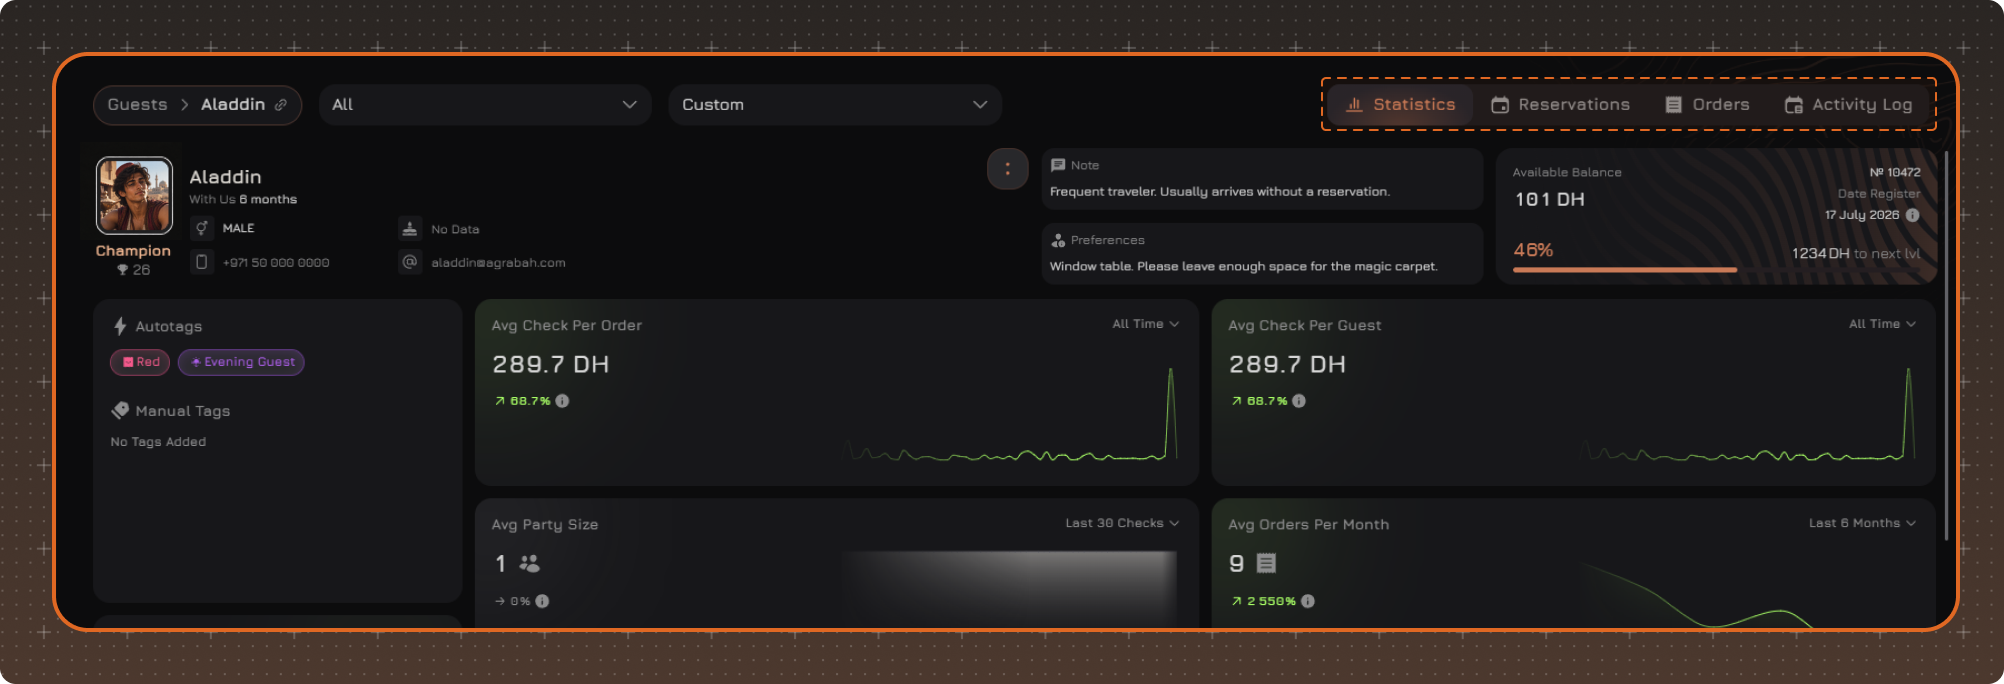
The guest profile consists of four tabs:
✔ Statistics
✔ Reservations
✔ Orders
✔ Activity Log
Note. When the window is narrow, tab names may be replaced with icons.
Data Filtering
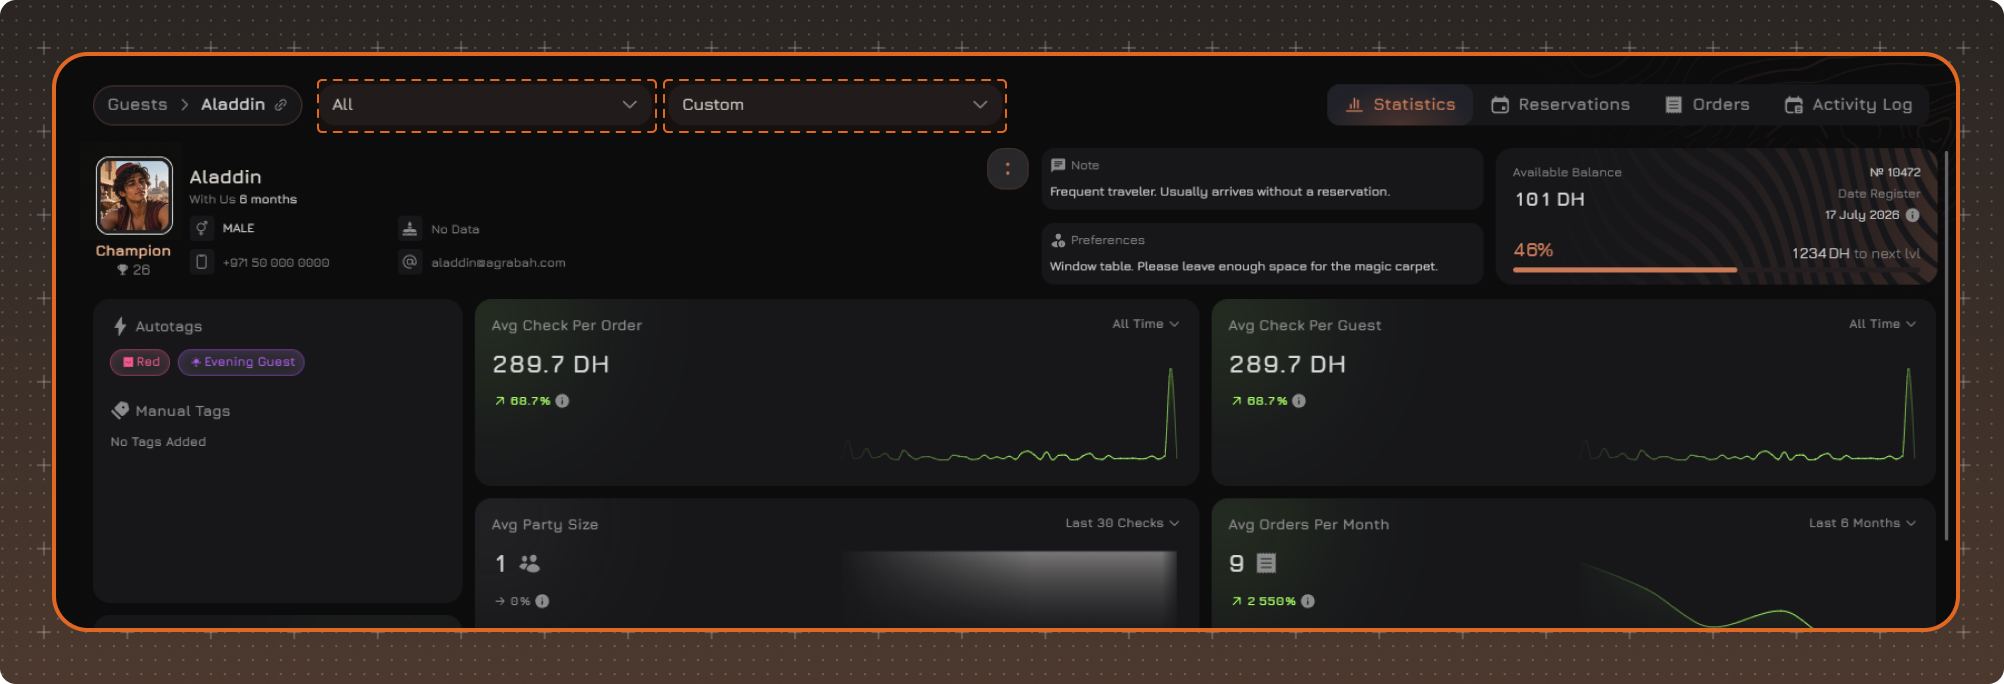
To view statistics for a specific location or location group, select the required value from the location dropdown.
To change the period used to calculate statistics, select the required period from the period dropdown.
After changing the selected values, all metrics and charts on the page are recalculated automatically.
Note. The Average Orders Per Month widget uses its own period selection and does not depend on the general page period.
Personal Information
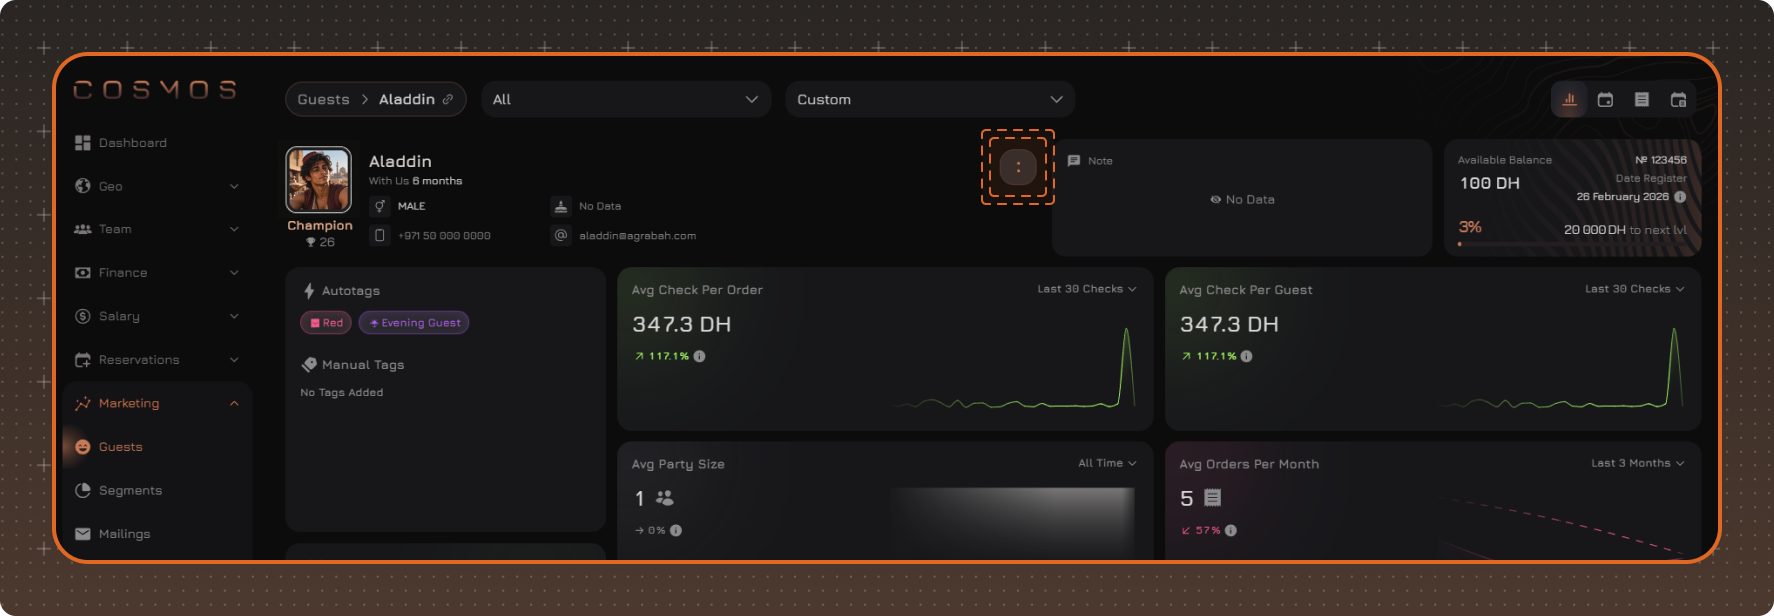
To edit the guest's personal information, click the button with the colon icon and select Edit. Make the required changes and click Save.
For more information about changing a phone number, see Phone Numbers.
Statistics
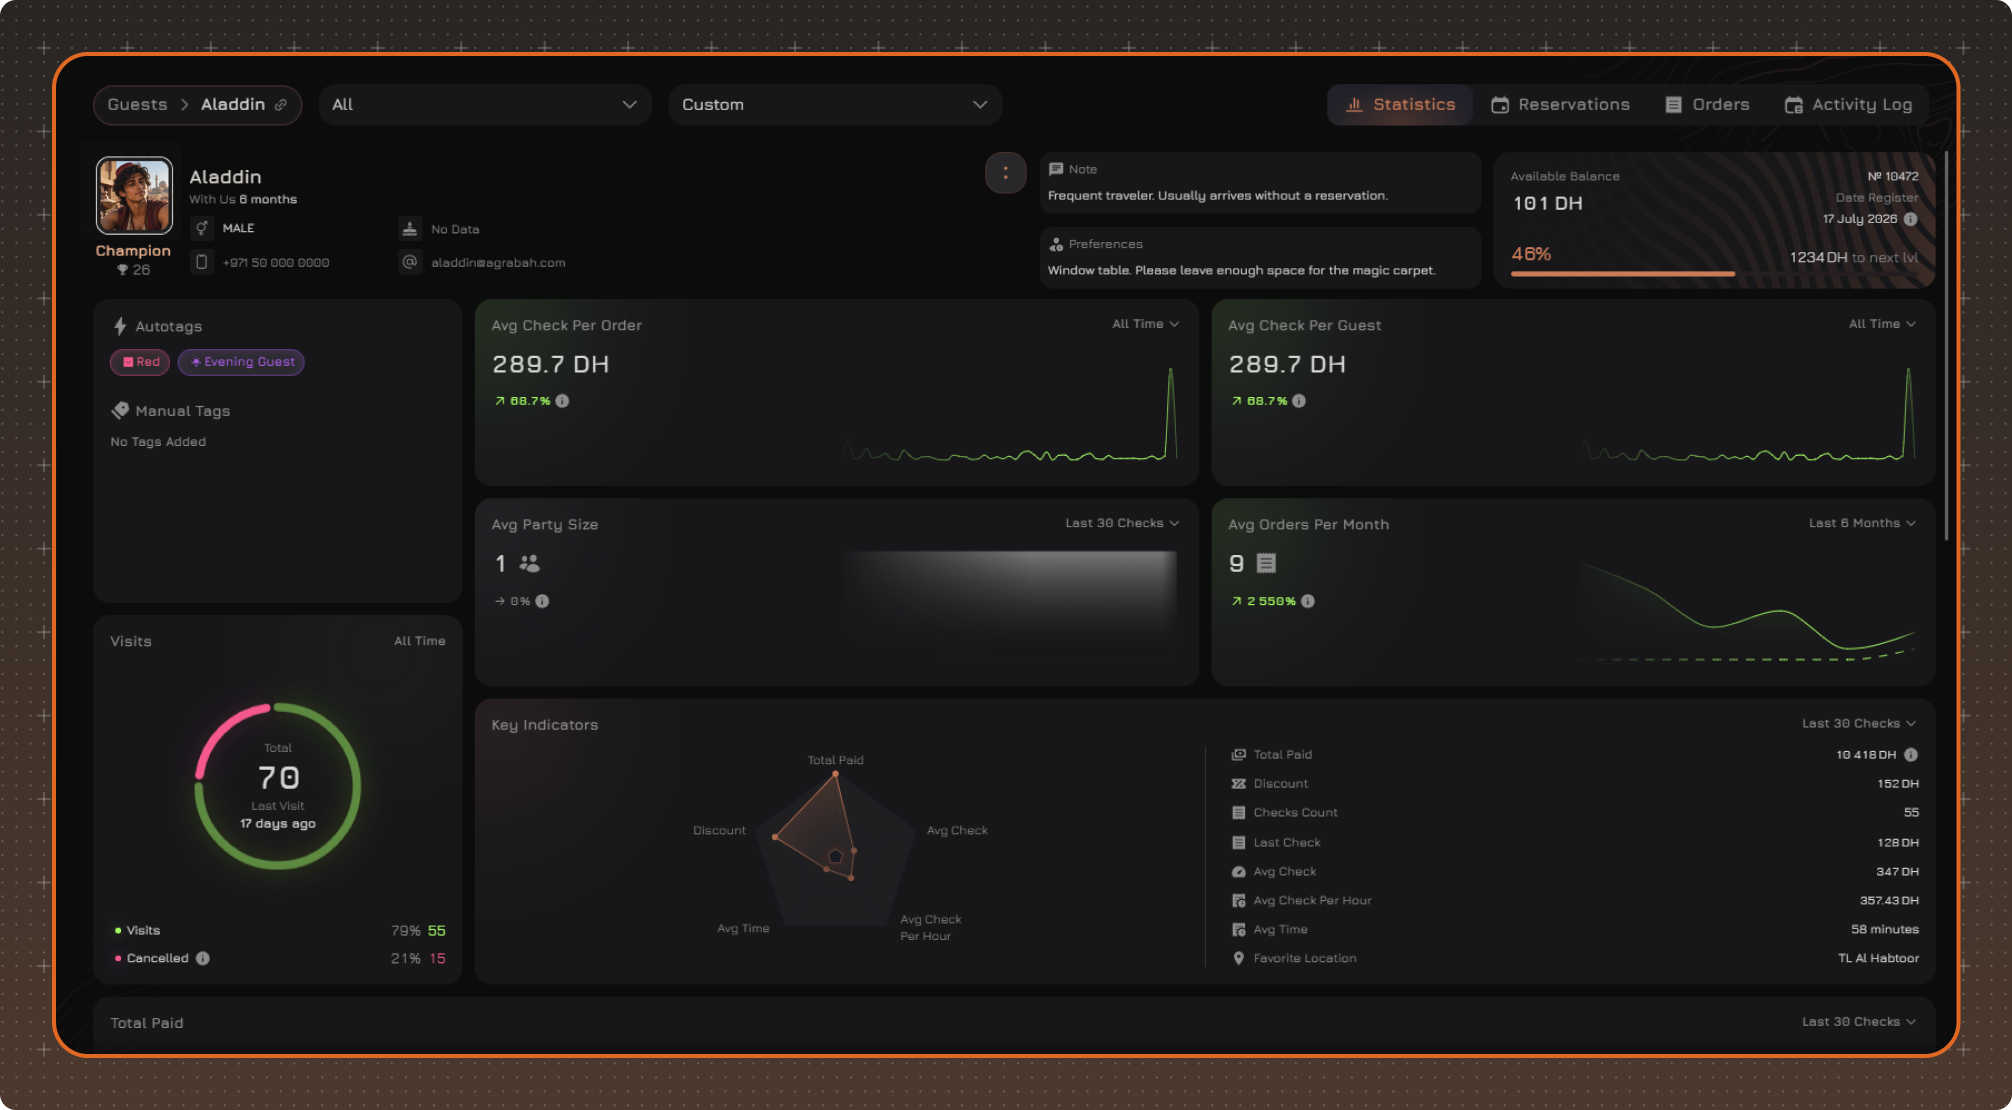
When you open a guest profile, the Statistics tab is displayed by default. It contains information that helps you evaluate the guest's activity, visit history, and preferences. The data is presented as metrics and charts.
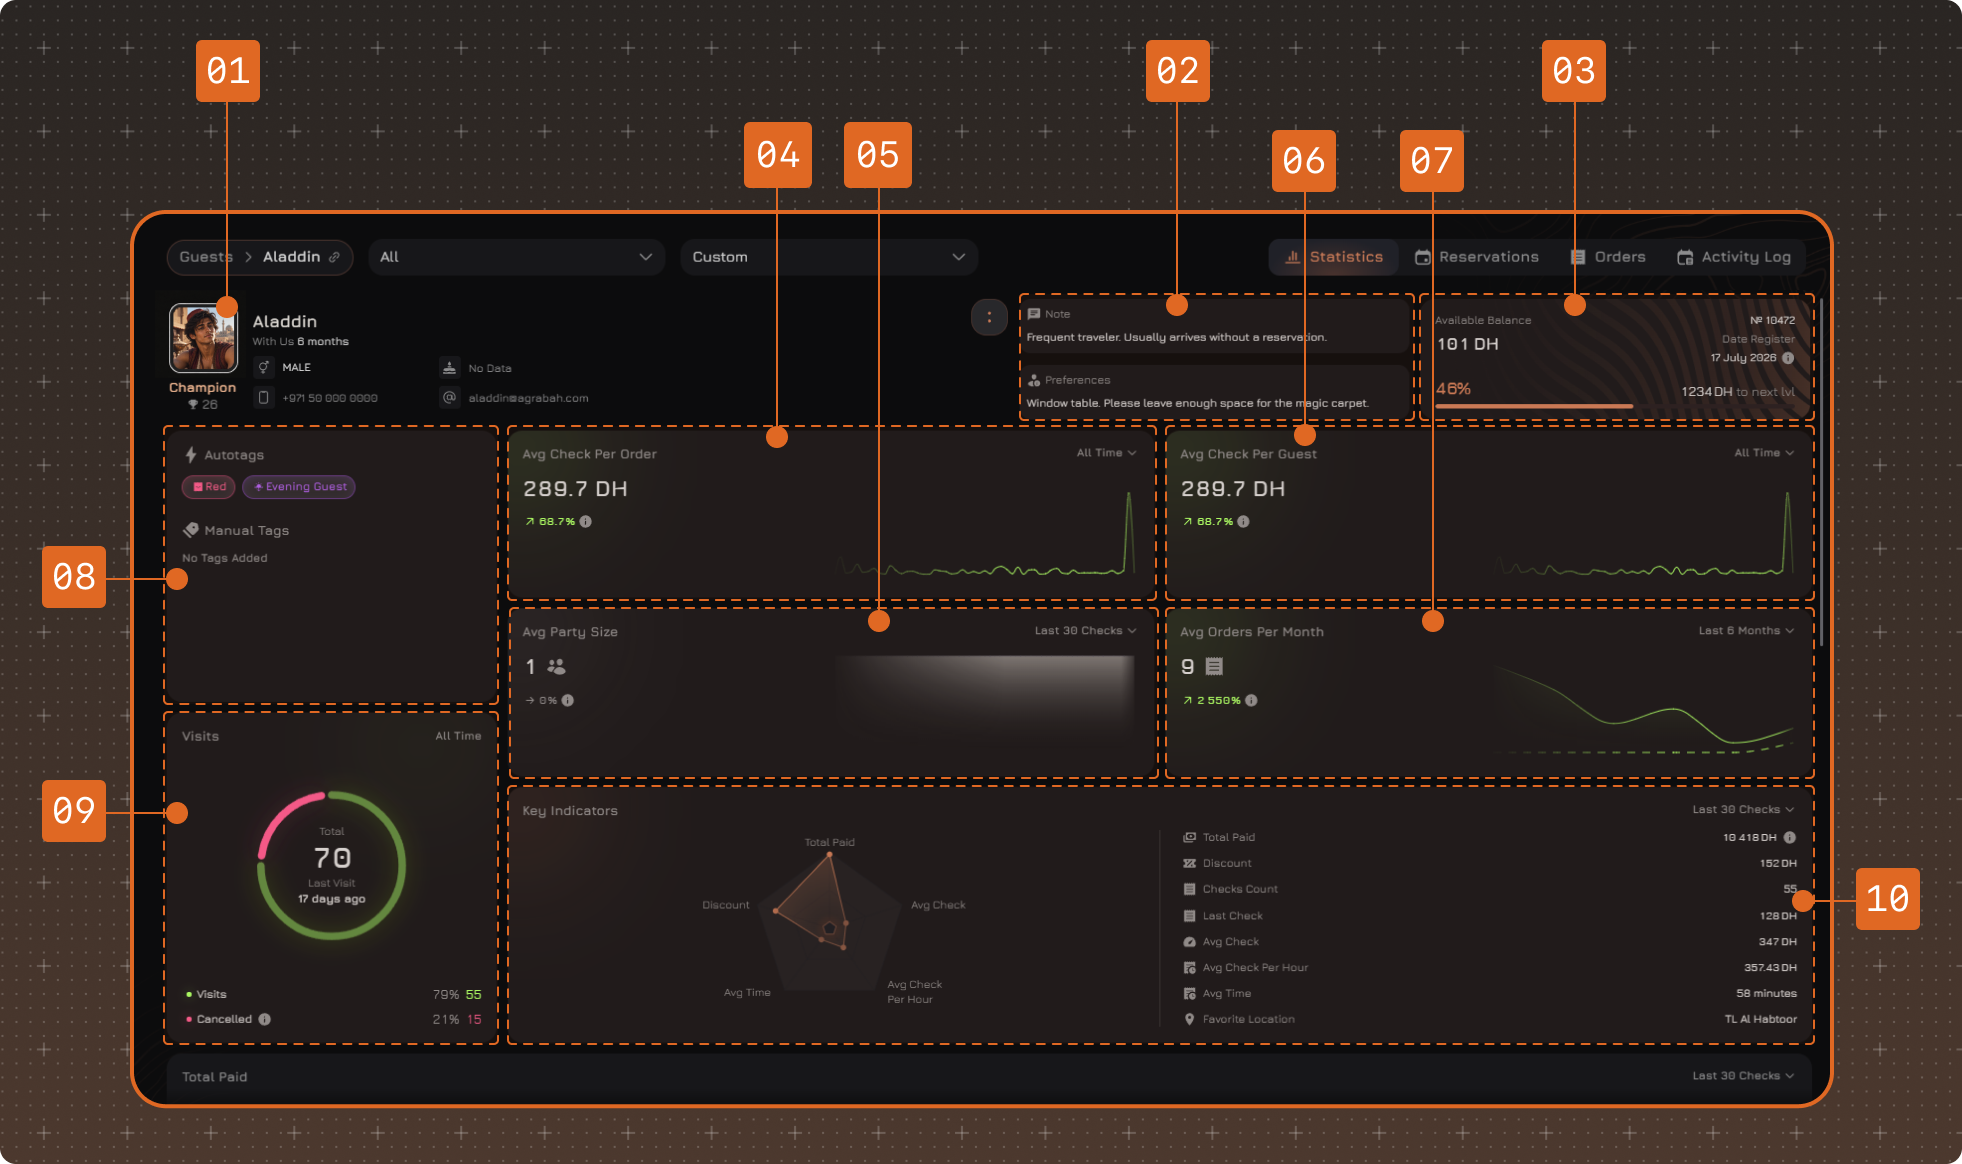
1. Guest Avatar
2. Note and Preferences
3. Loyalty Program
4. Average Check Per Order
5. Average Party Size
6. Avg Check Per Guest
7. Average Orders Per Month
8. Autotags and Manual Tags
9. Visits
10. Key Indicators
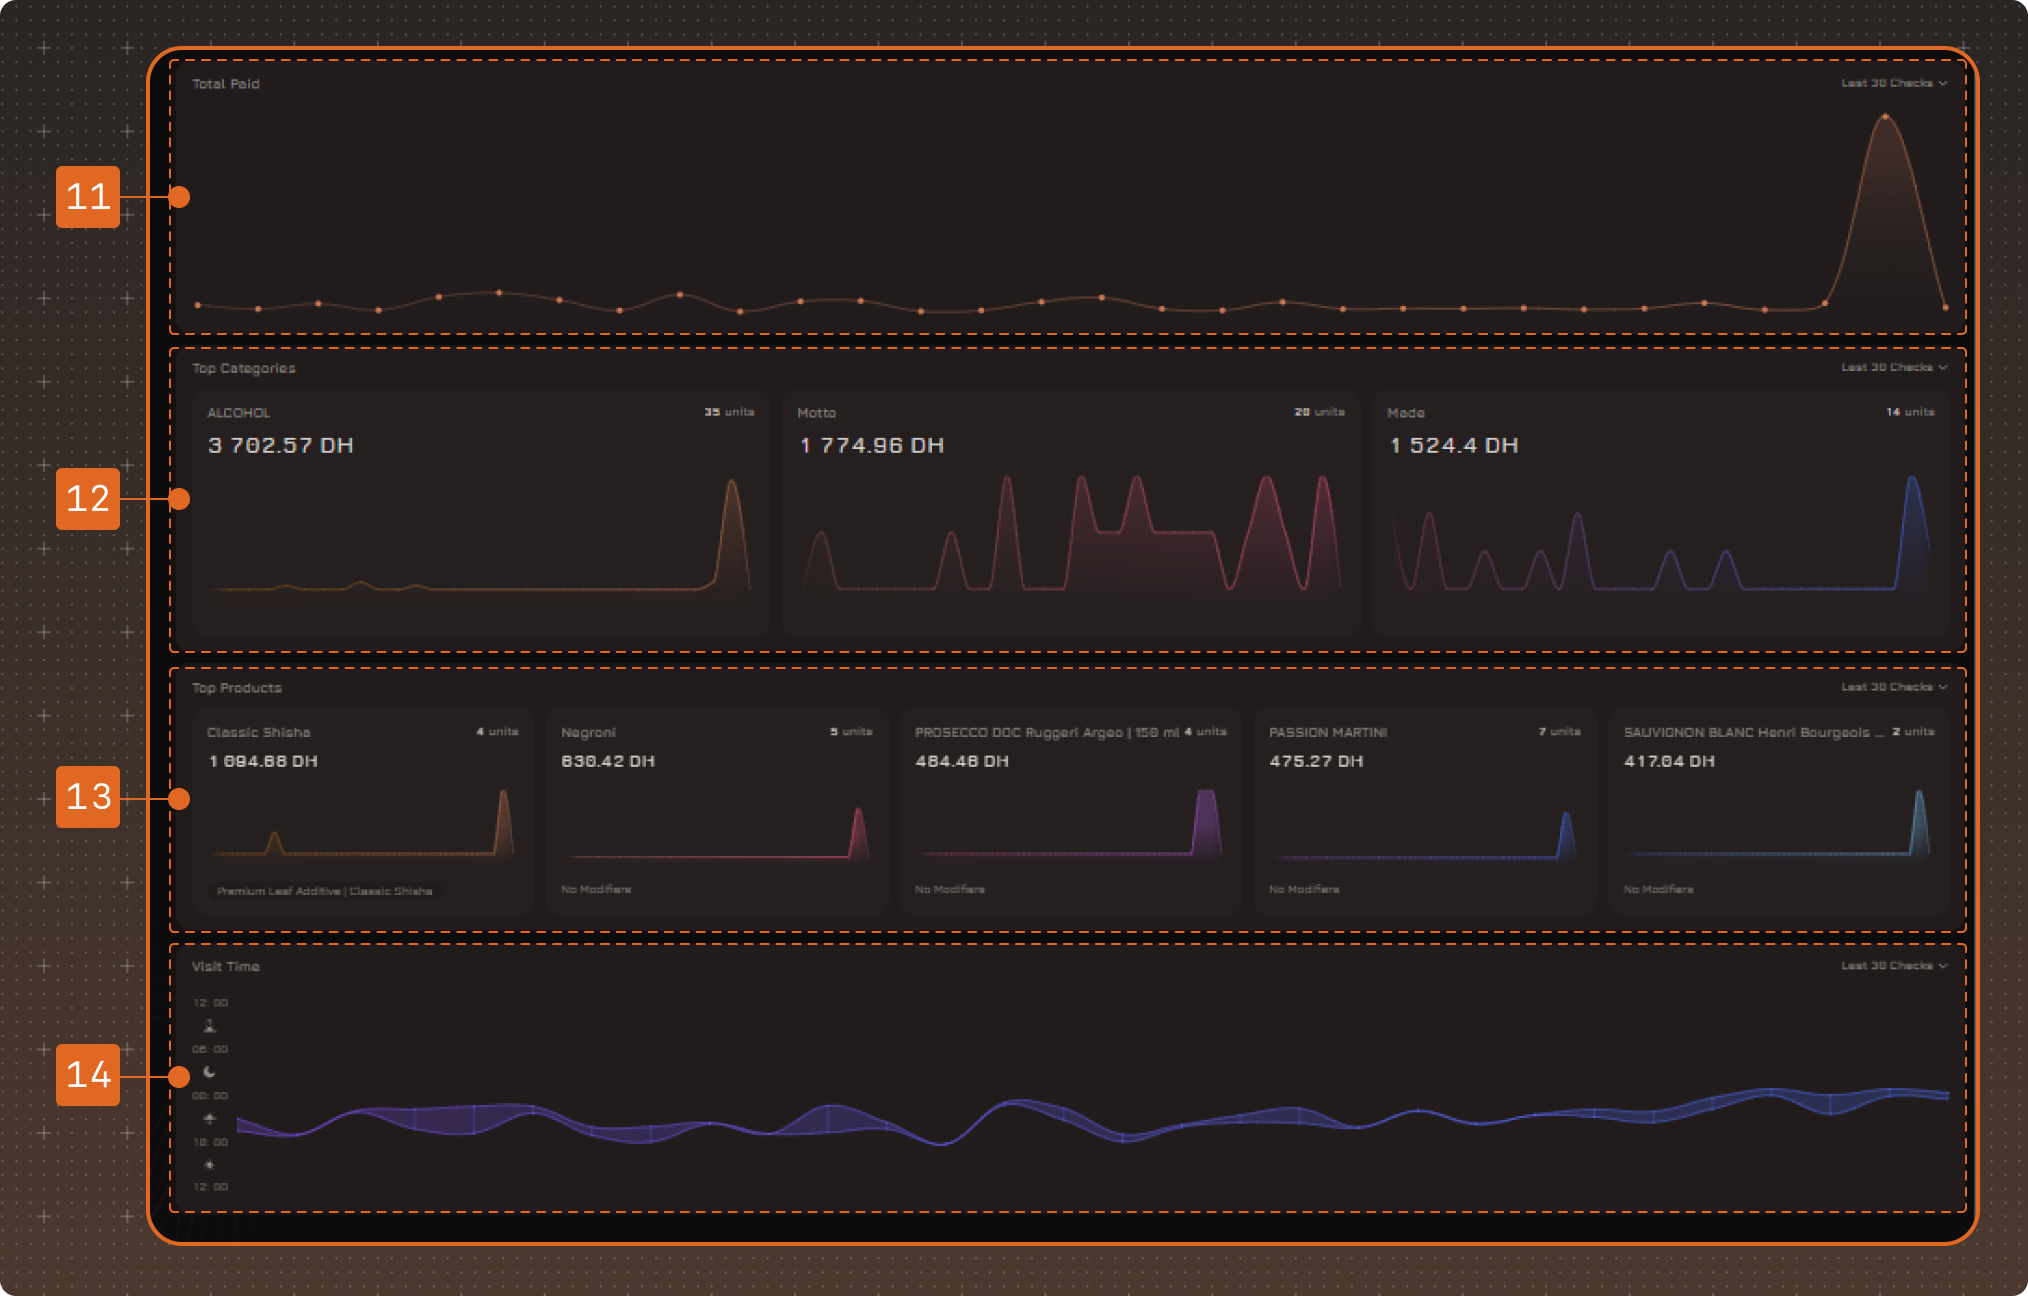
11. Total Paid
12. Top Categories
13. Top Products
14. Visit Time
1. Guest Avatar
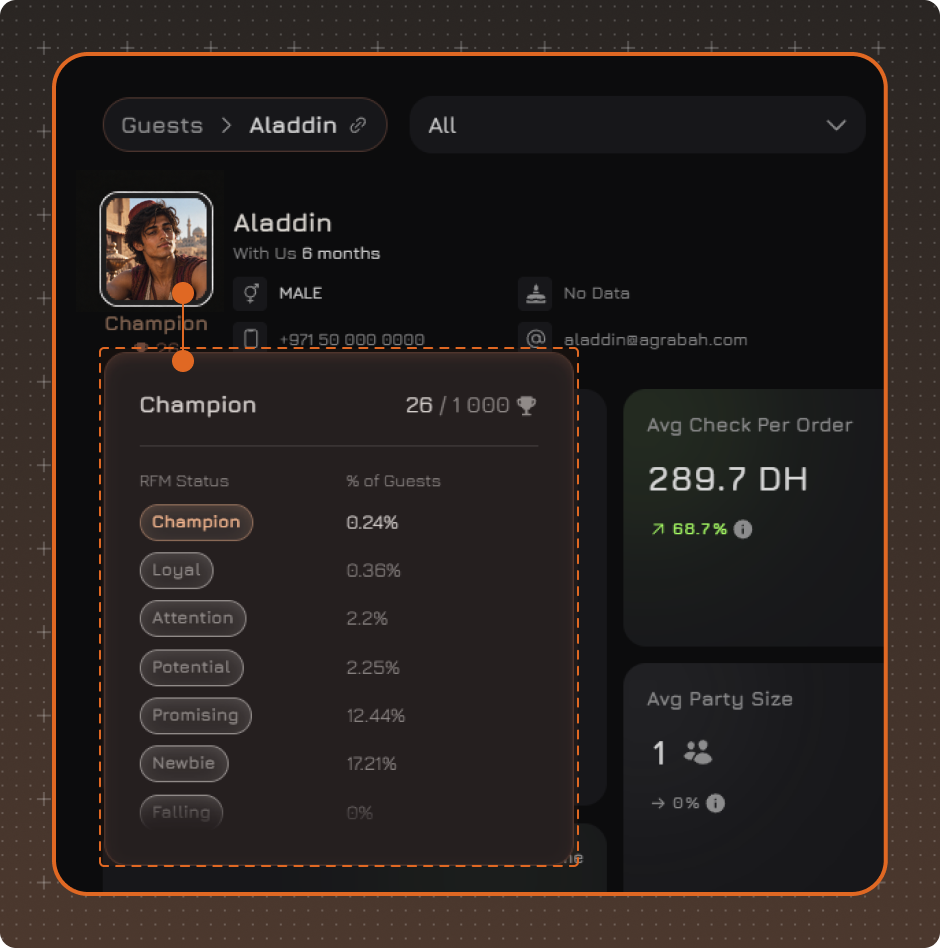
Hover over the guest avatar to view the guest's RFM information.
The tooltip displays:
✔ current RFM Status
✔ RFM Score, if calculated
✔ a brief description of the current RFM Status
For more information, see the RFM page.
2. Note and Preferences
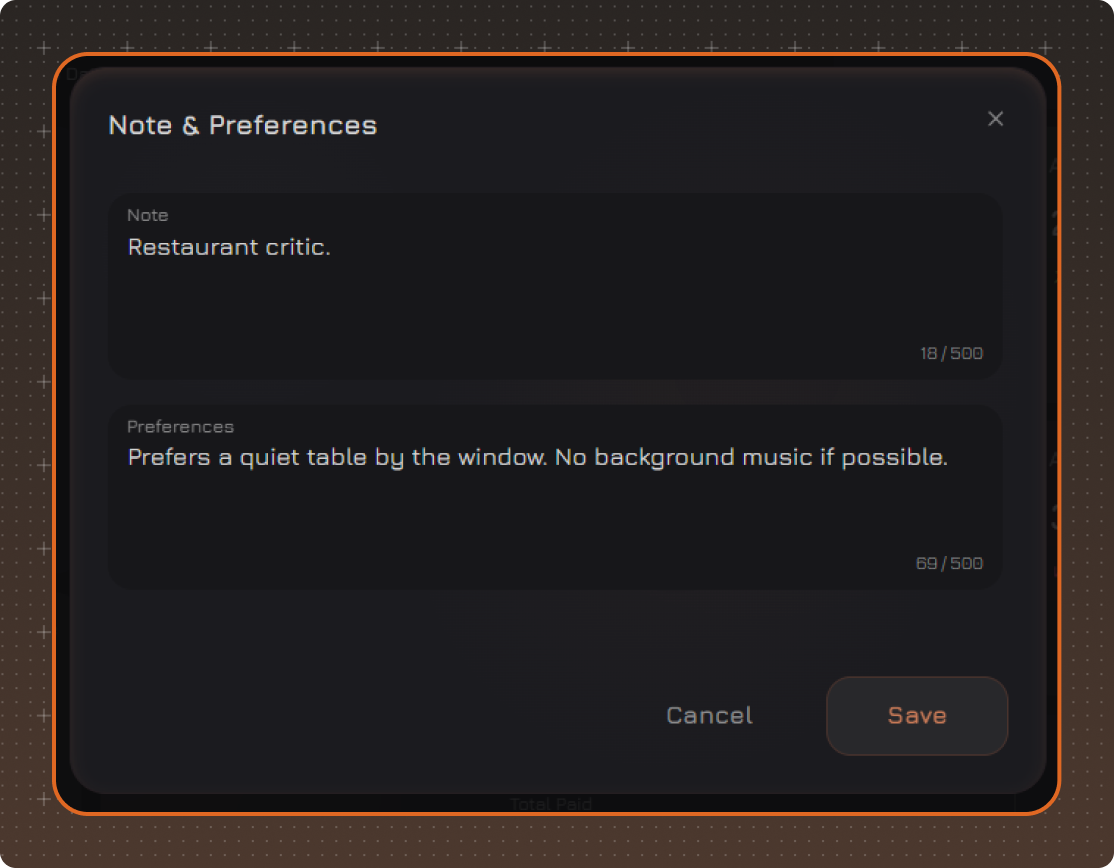
The Note widget contains two independent fields:
✔ Note — used to store general information about the guest and displayed only in the guest profile
✔ Preferences — used to store the guest's service preferences. They are displayed in the Waiter app and help employees take the guest's preferences into account
Click the widget to view or edit both fields.
3. Loyalty Program
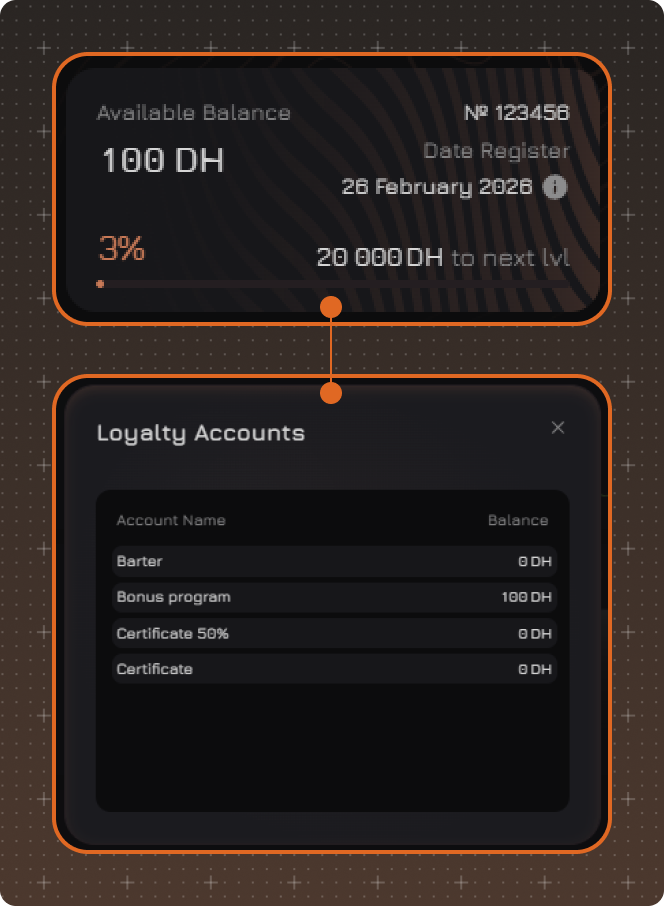
The loyalty program widget is located at the top of the guest profile. It displays the balance of the bonus account linked to the loyalty card.
Click the widget to open a list of all the guest's bonus accounts. The name and current balance are displayed for each account.
If the guest does not participate in the loyalty program, the widget displays No Loyalty Card.
4. Average Check Per Order
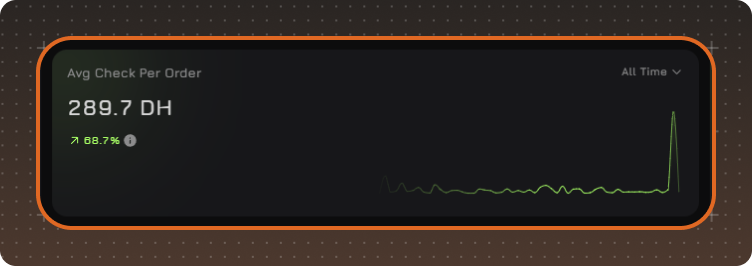
Displays the average value of one guest order.
The calculation is based on closed checks at the selected locations for the selected period.
The chart shows how the average check changes as orders are placed.
5. Average Party Size
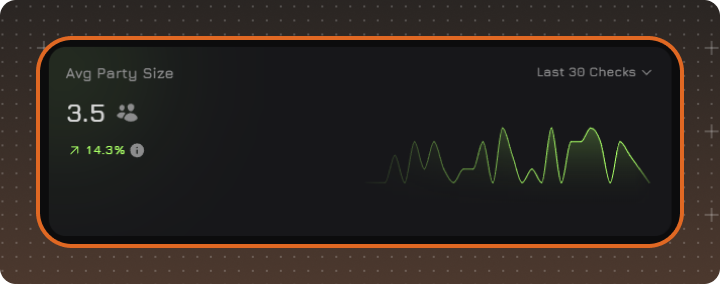
Displays the average number of guests per visit.
The calculation is based on closed checks at the selected locations for the selected period.
The chart shows how the average party size changes as orders are placed.
6. Avg Check Per Guest
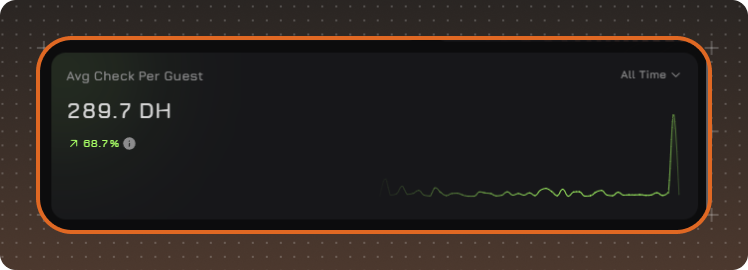
Displays the average amount spent by one guest per visit.
The calculation is based on closed checks at the selected locations for the selected period.
The average check is calculated by dividing the total amount of the checks by the total number of guests specified in those checks.
7. Average Orders Per Month
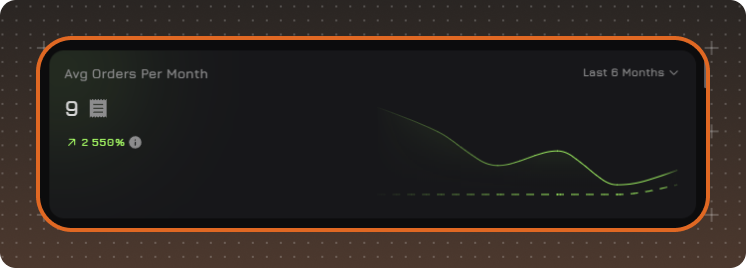
Displays the guest's average number of orders per month.
The calculation is based on closed checks at the selected locations.
The widget uses its own period selection, independent of the general page period.
The chart displays:
- a solid line — data for the selected period
- a dashed line — data for the previous equivalent period
Note. Full calendar periods are used for the calculation. For example, Last Month means the last full calendar month, not the last 30 days.
8. Tags
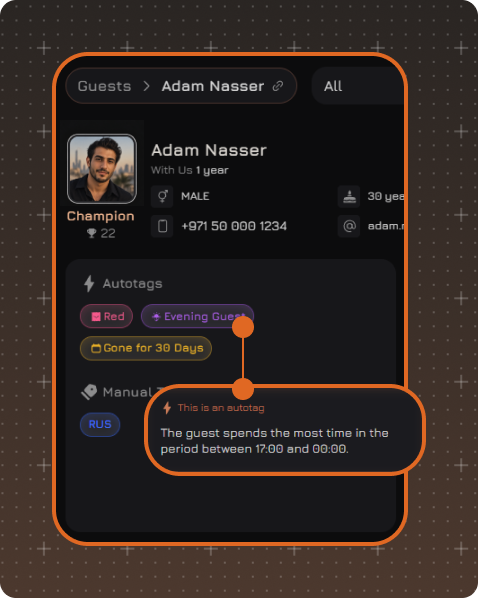
The Tags widget displays Autotags and Manual Tags assigned to the guest.
Hover over a tag to view its full name and description, if provided.
To add Manual Tags, click the edit icon next to the Manual Tags field. In the window that opens, select the required tags.
For more information, see the Manual Tags and Autotags pages.
9. Visits
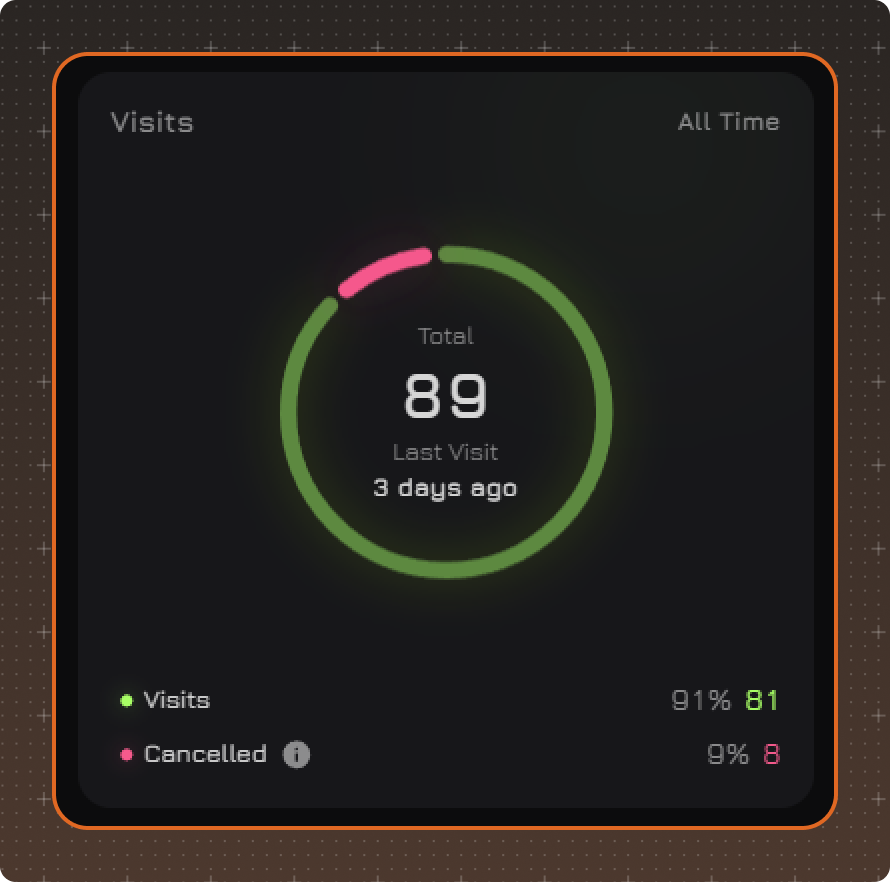
The widget displays information about the guest's visits.
The data is calculated based on closed checks and cancelled reservations.
The following information is displayed:
✔ total number of visits
✔ number of cancelled reservations
✔ date of the last visit
✔ percentage of visits and cancellations
Note. The number of visits is calculated for all time and does not depend on the selected period.
10. Key Indicators
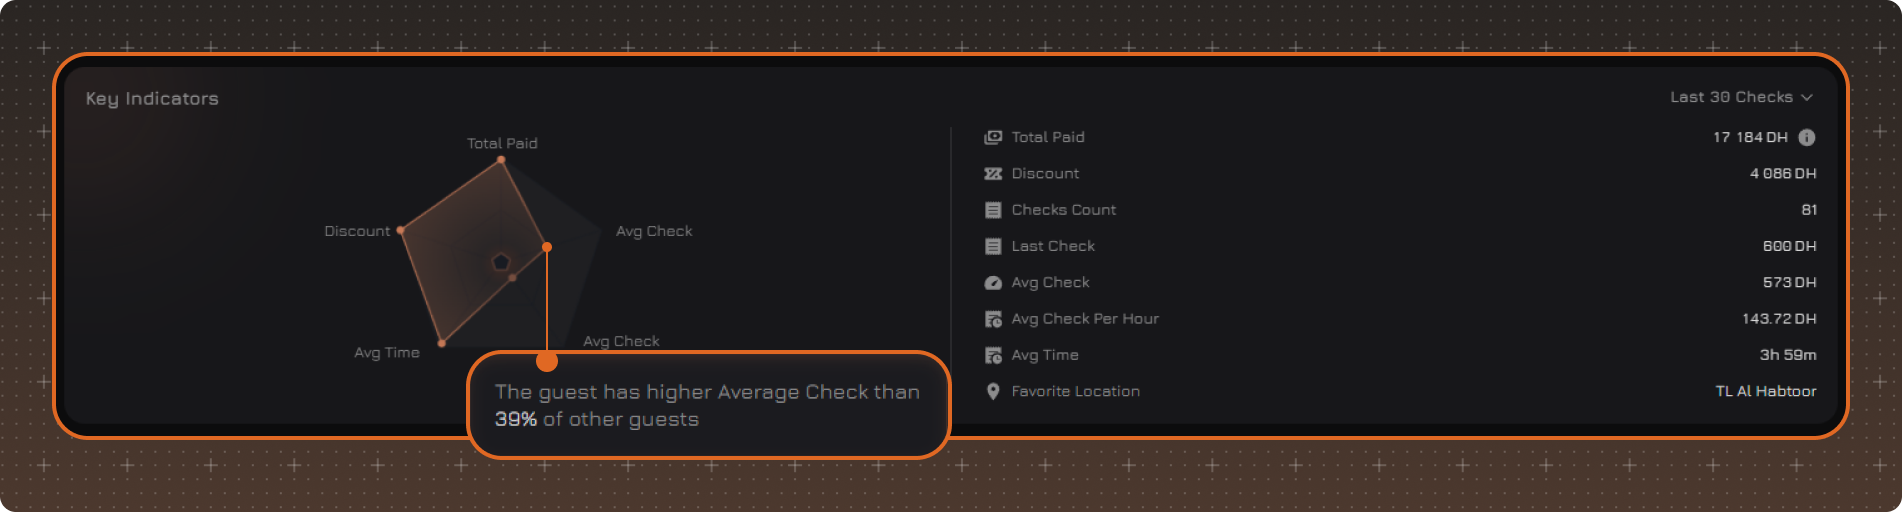
Displays the guest's key indicators for the selected period.
The calculation is based on closed checks at the selected locations for the selected period.
The following indicators are displayed:
Total Paid
Discount
Checks Count
Last Check
Avg Check
Avg Check Per Hour
Avg Time
Favorite Location
The radial chart displays the relative values of the following indicators compared with other guests at the selected locations:
✔ Total Paid
✔ Discount
✔ Avg Check
✔ Avg Check Per Hour
✔ Avg Time
When you hover over a point on the chart, the guest's position relative to other guests is displayed. For example: "The guest has higher Average Check than 39% of other guests."
The value depends on the selected period and is recalculated when the period changes.
✔ check duration is at least 30 minutes
✔ check total is at least 50 AED for the UAE or 1,000 RUB for Russia
11. Total Paid
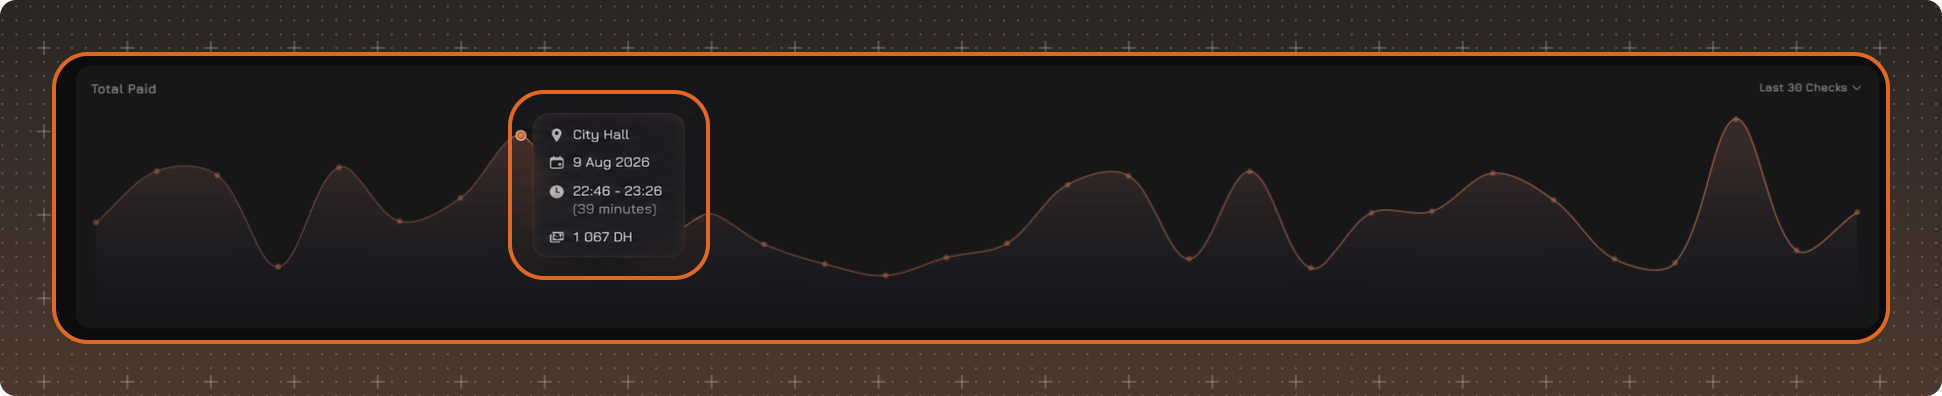
Displays the guest's check totals in chronological order for the selected period.
The calculation is based on closed checks at the selected locations for the selected period.
The chart displays:
- X-axis — the sequence of checks
- Y-axis — the total amount of each check
In Last 30 Checks mode, individual checks are displayed as points on the chart. Hover over a point to view:
✔ Location
✔ Check Date
✔ Visit Start and End Time
✔ Visit Duration
✔ Check Total
Click a point to open the order details.
12. Top Categories
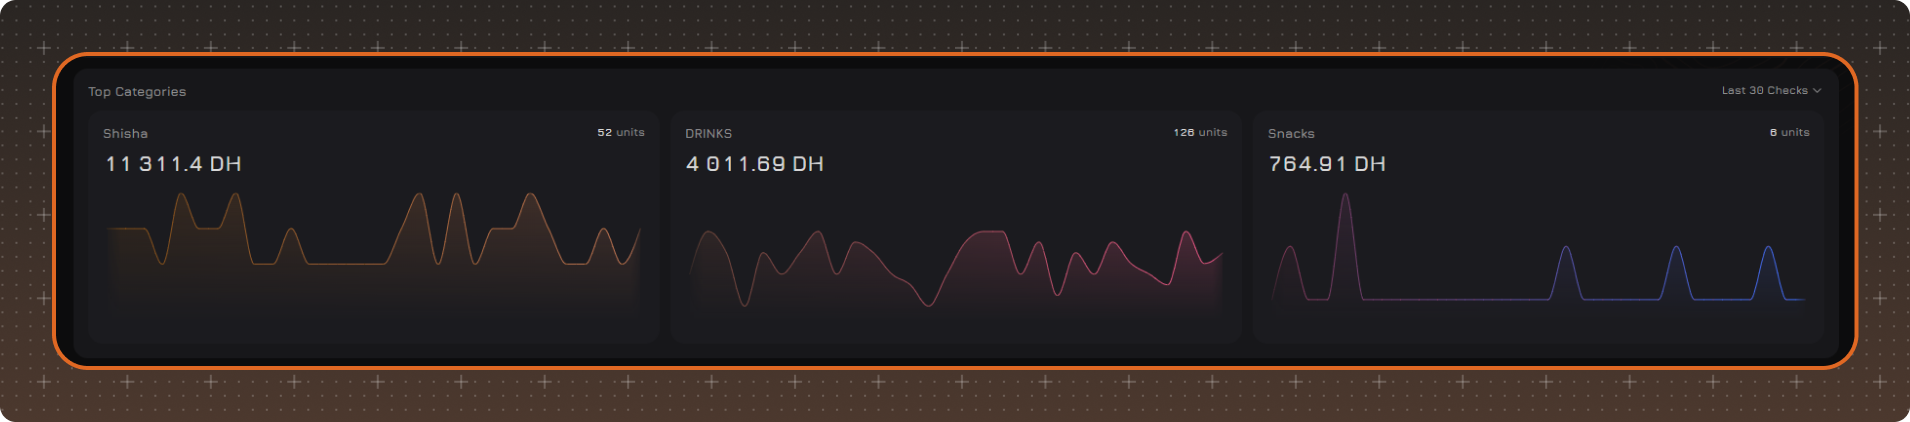
Displays the three product categories with the highest total sales at the selected locations for the selected period.
For each category, the following information is displayed:
✔ category name
✔ total sales
✔ number of items sold
Note. Only categories with Guest Stats enabled in the Menu section are included in the calculation.
The chart displays:
- X-axis — the sequence of checks
- Y-axis — the category sales amount in each check
13. Top Products
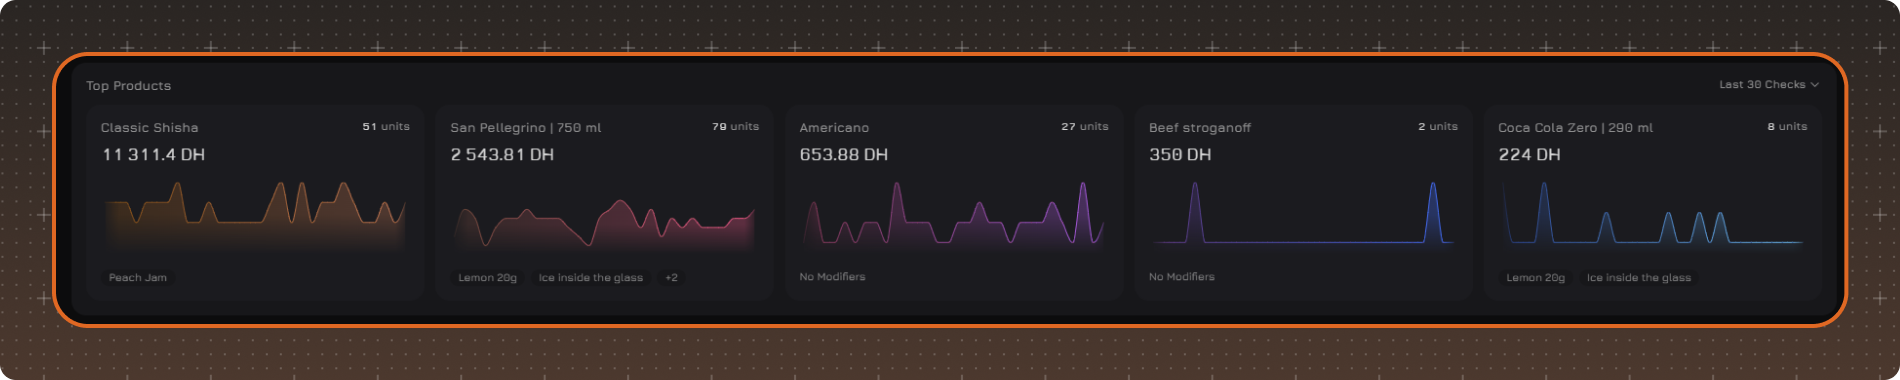
Displays the five products with the highest total sales at the selected locations for the selected period.
For each product, the following information is displayed:
✔ product name
✔ total sales
✔ number of items sold
✔ modifiers
Hover over the modifiers to view a list of all modifiers and their quantities.
14. Visit Time
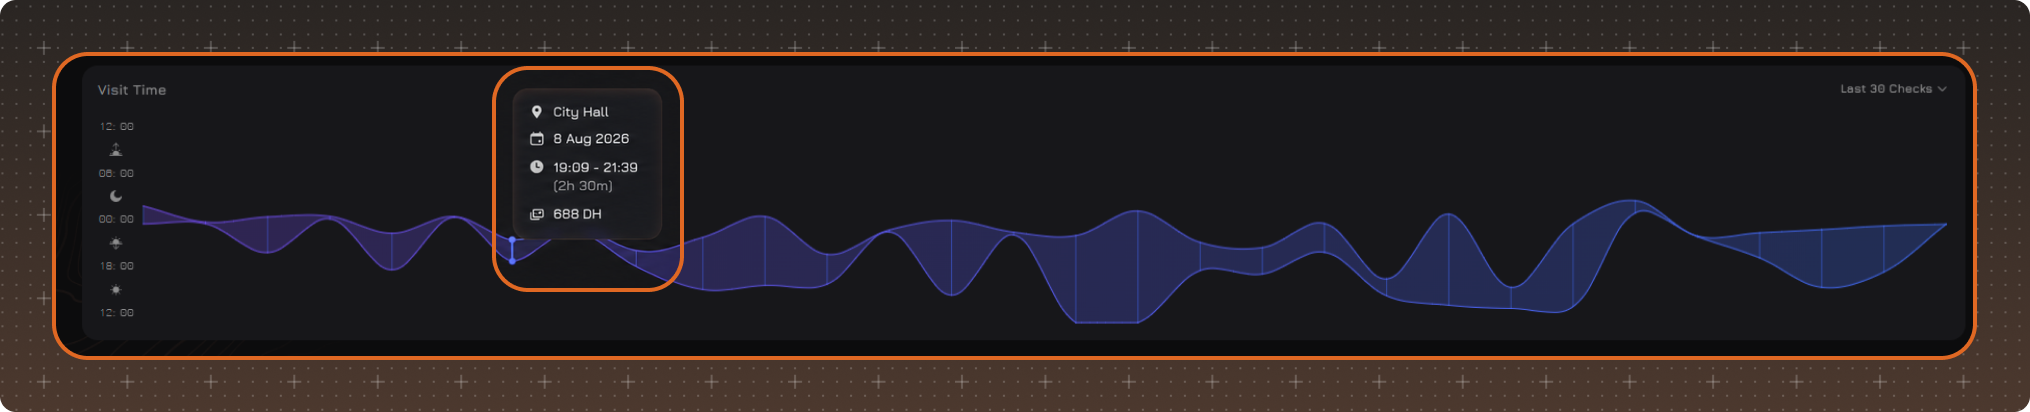
Displays the start and end times of the guest's visits for the selected period.
The calculation is based on closed checks at the selected locations for the selected period.
The chart displays:
- X-axis — the sequence of checks
- Y-axis — time of day
- the start and end time of each visit
- visit duration as the area between the lines
In Last 30 Checks mode, hover over a visit to view:
✔ location
✔ visit date
✔ start and end time
✔ visit duration
✔ check total
Click a visit marker to open the order details.
Blacklist
To add a guest to the blacklist, click the button with the colon icon and select Add to Blacklist.
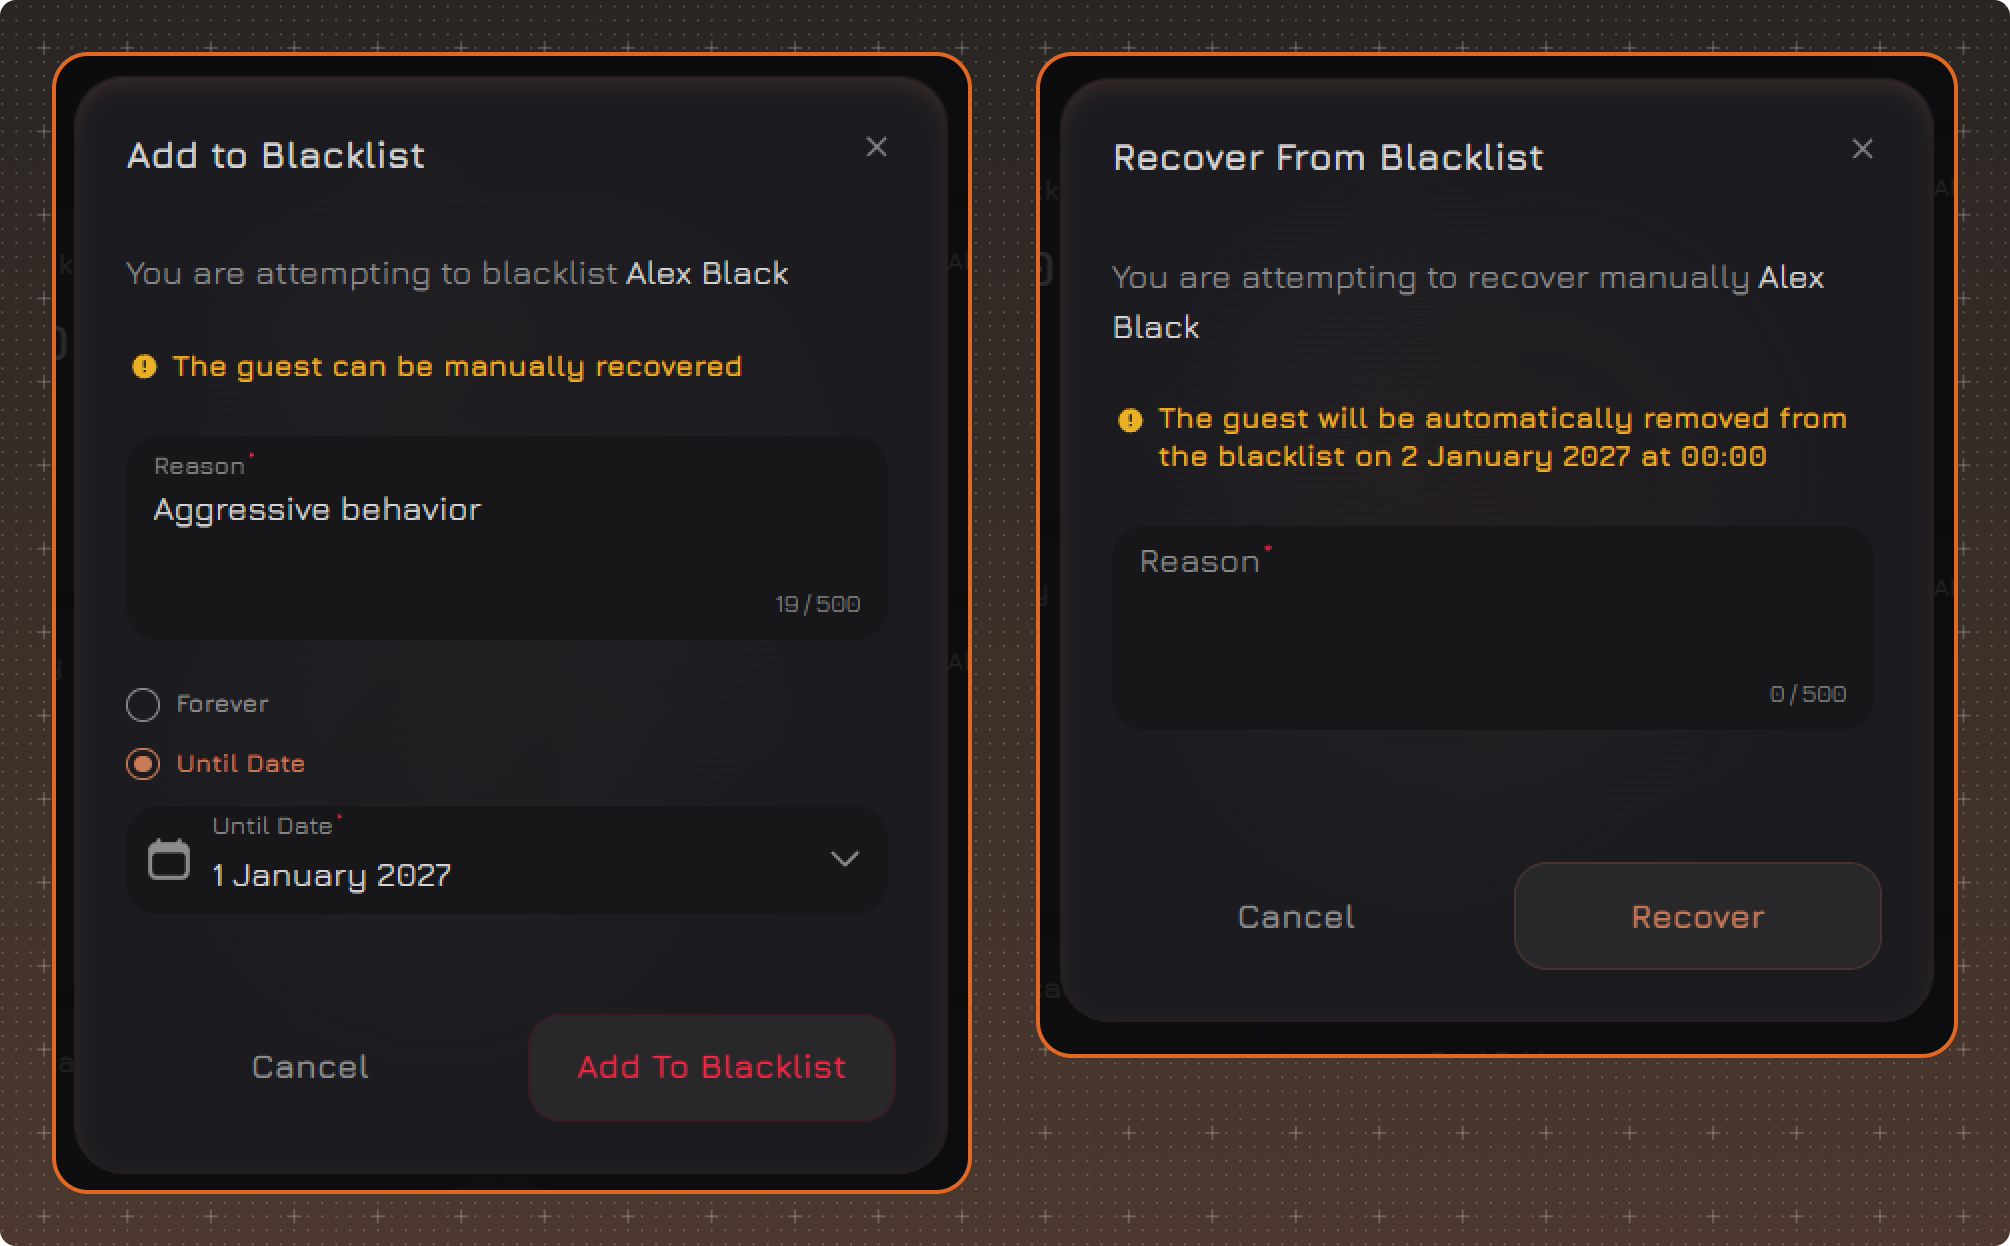
When adding a guest to the blacklist, specify the reason and duration:
- Forever
- Until Date
To remove a guest from the blacklist, click the button with the colon icon, select Remove from Blacklist, specify the reason, and confirm the action.