

Reservation Timeline
Navigation and functionality of the Timeline
The module has three display modes for reservations. Each one is suitable for different tasks: working with reservations, analyzing occupancy and managing guest seating.
- Timeline
- Floor Plan
- Table
Timeline
Timeline is an area with a time scale on which all reservations are displayed.
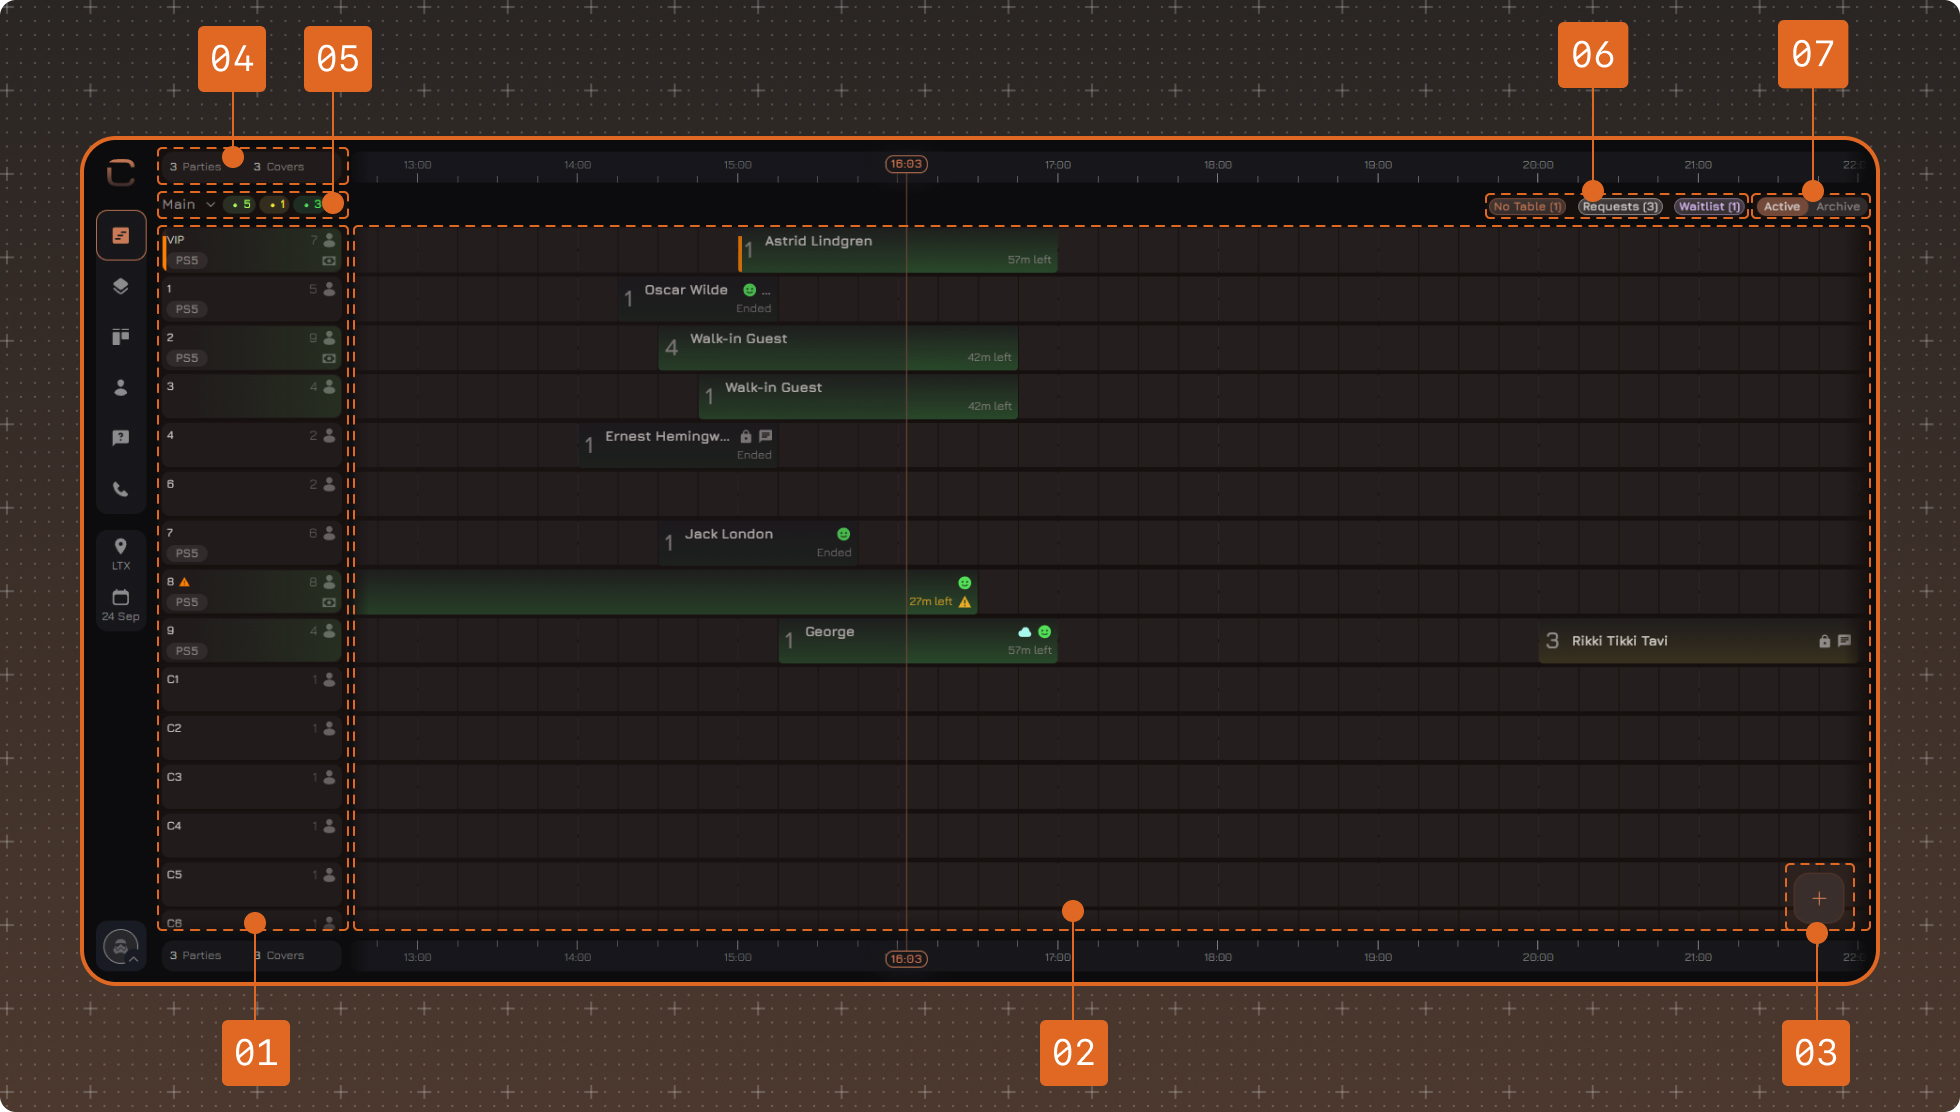
Main elements:
- List of floors and tables. Floors can be collapsed and expanded.
- Time scale with reservations.
- Button to create a reservation.
- Statistics of completed reservations for the day.
- Information on reservations on the selected floor. Colors correspond to the status model.
- No Table, Requests and Waitlist buttons — open the corresponding lists in the sidebar on the right.
- Archive button — opens the list of canceled reservations.
No Table, Requests and Waitlist
The counter on each button shows the number of records in the corresponding list.
- No Table — reservations that have not yet been assigned a table.
- Requests — reservation requests received through the website widget. Click a request to view detailed information. A request can be rejected or confirmed and used to create a reservation. When creating a reservation, you can select a table, leave the reservation without a table or set the Waitlist status. For more information about working with requests, read the article Reservation Requests.
- Waitlist — records for which a reservation cannot be confirmed yet, for example if there is no suitable table or the required time is unavailable. A record does not reserve a table and does not block time. When it becomes possible to confirm the reservation, the record can be converted into a regular reservation. For more information about working with the waitlist, read the article Waitlist.
Creating a Reservation on Timeline
You can create a reservation directly on the timeline in several ways:
- Single click opens a sidebar to create a reservation.
- Click and drag right or left allow you to immediately set the reservation duration.
- Drag up or down allows you to select multiple tables at once (more about multi-reservation).
Reservation creation button in the lower right corner. More about ways to create a reservation — in the article Creating a Reservation.Table List
When you select a table, information about it is displayed:
- Layout and maximum capacity.
- Tags.
- Deposits and exclusions.
To block a table you need to specify:
- One or more tables.
- Block start time and duration.
- Reason for blocking.
Floor Plan
Floor plan is a visual representation of the establishment's tables, which allows you to assess the hall occupancy and manage reservations tied to specific tables.
Table Display of Reservations
In this mode, reservations are displayed as a table. Records can be sorted and filtered. Also, a summary of reservations is displayed in the section taking into account the applied filters.
Page elements:
- Button to refresh table data.
- Setting of displayed columns.
- Summary of reservations based on selected filters.
Refresh.Read further: