

Guest List
In this section you will learn how to work with the guest list in the reservation module: search and filter guests, configure the table and open the guest card.
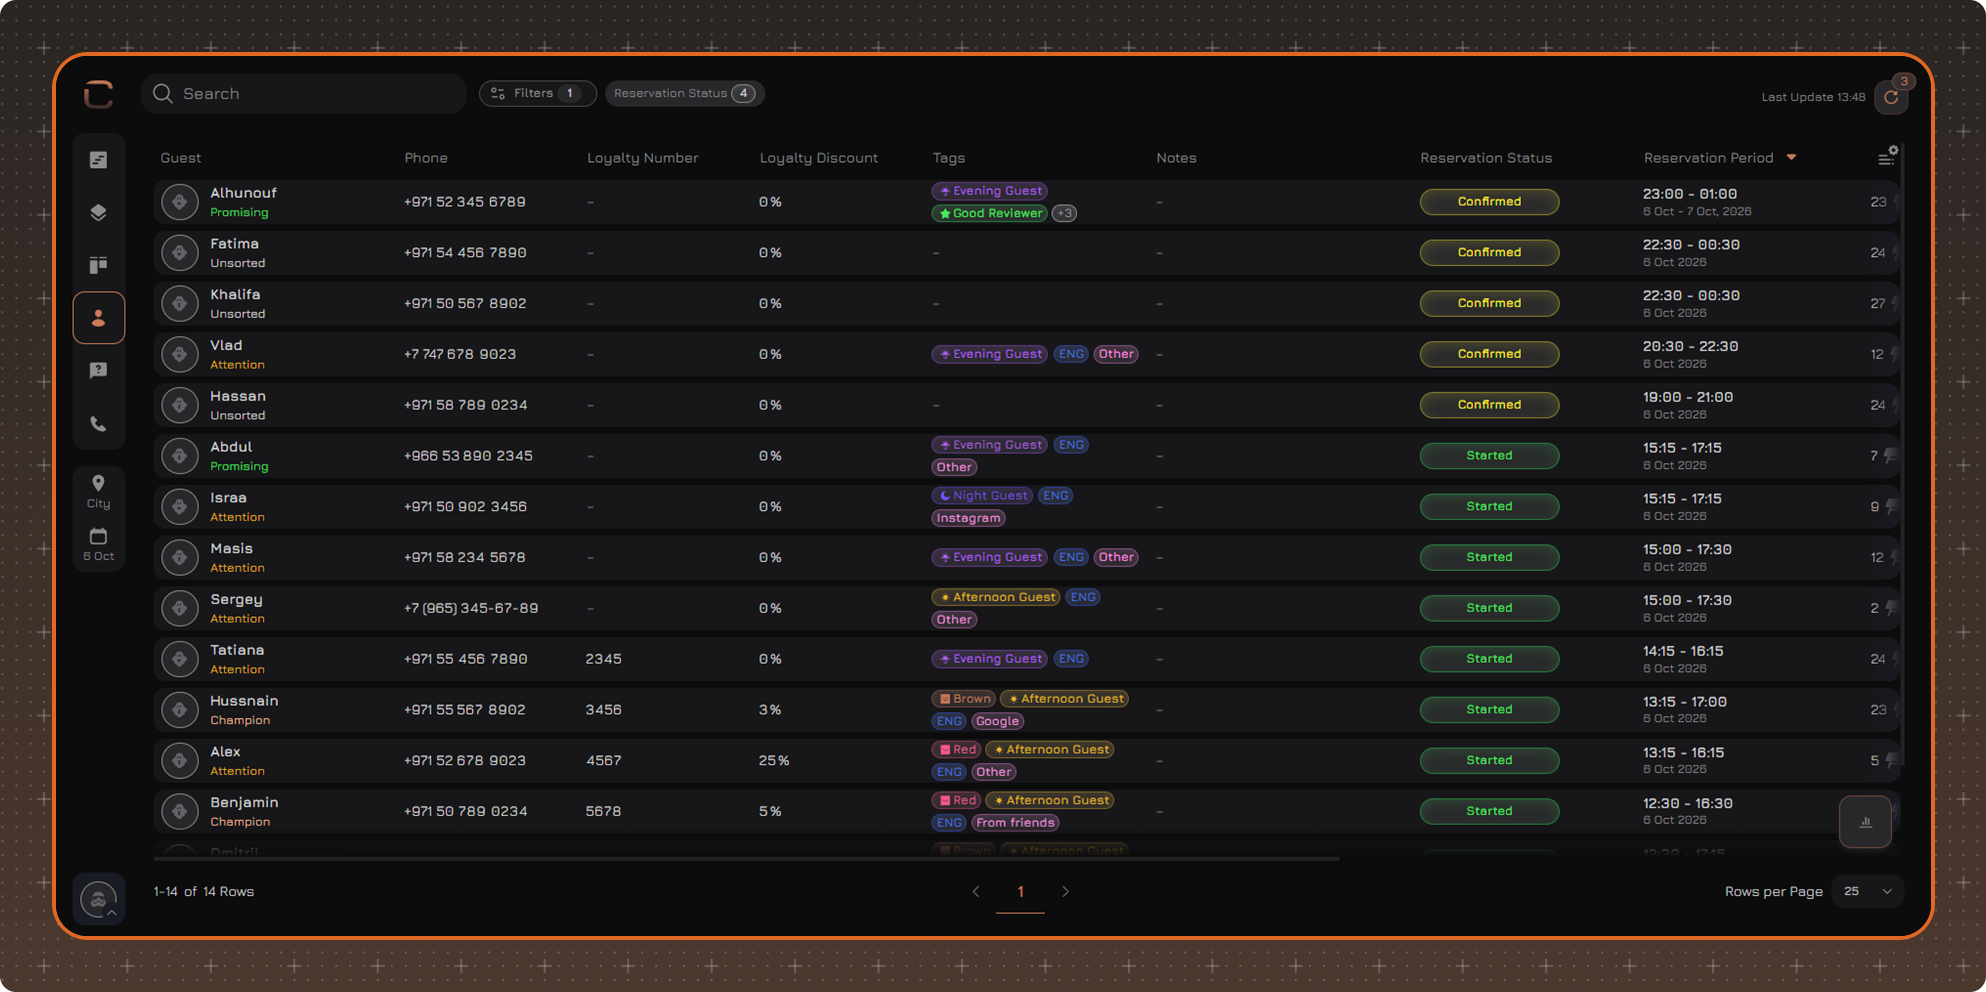
Guest List is a table view of the reservation module that shows guests who have reservations on the selected date. Unlike the timeline, the floor plan and the reservation list, here one row is one guest, even if the guest has several reservations.
The guest list helps you:
- prepare for guest visits;
- quickly find information about a guest;
- assess guest activity for the selected day.
To open the list, click the guest icon in the left menu of the reservation module.
Page Elements
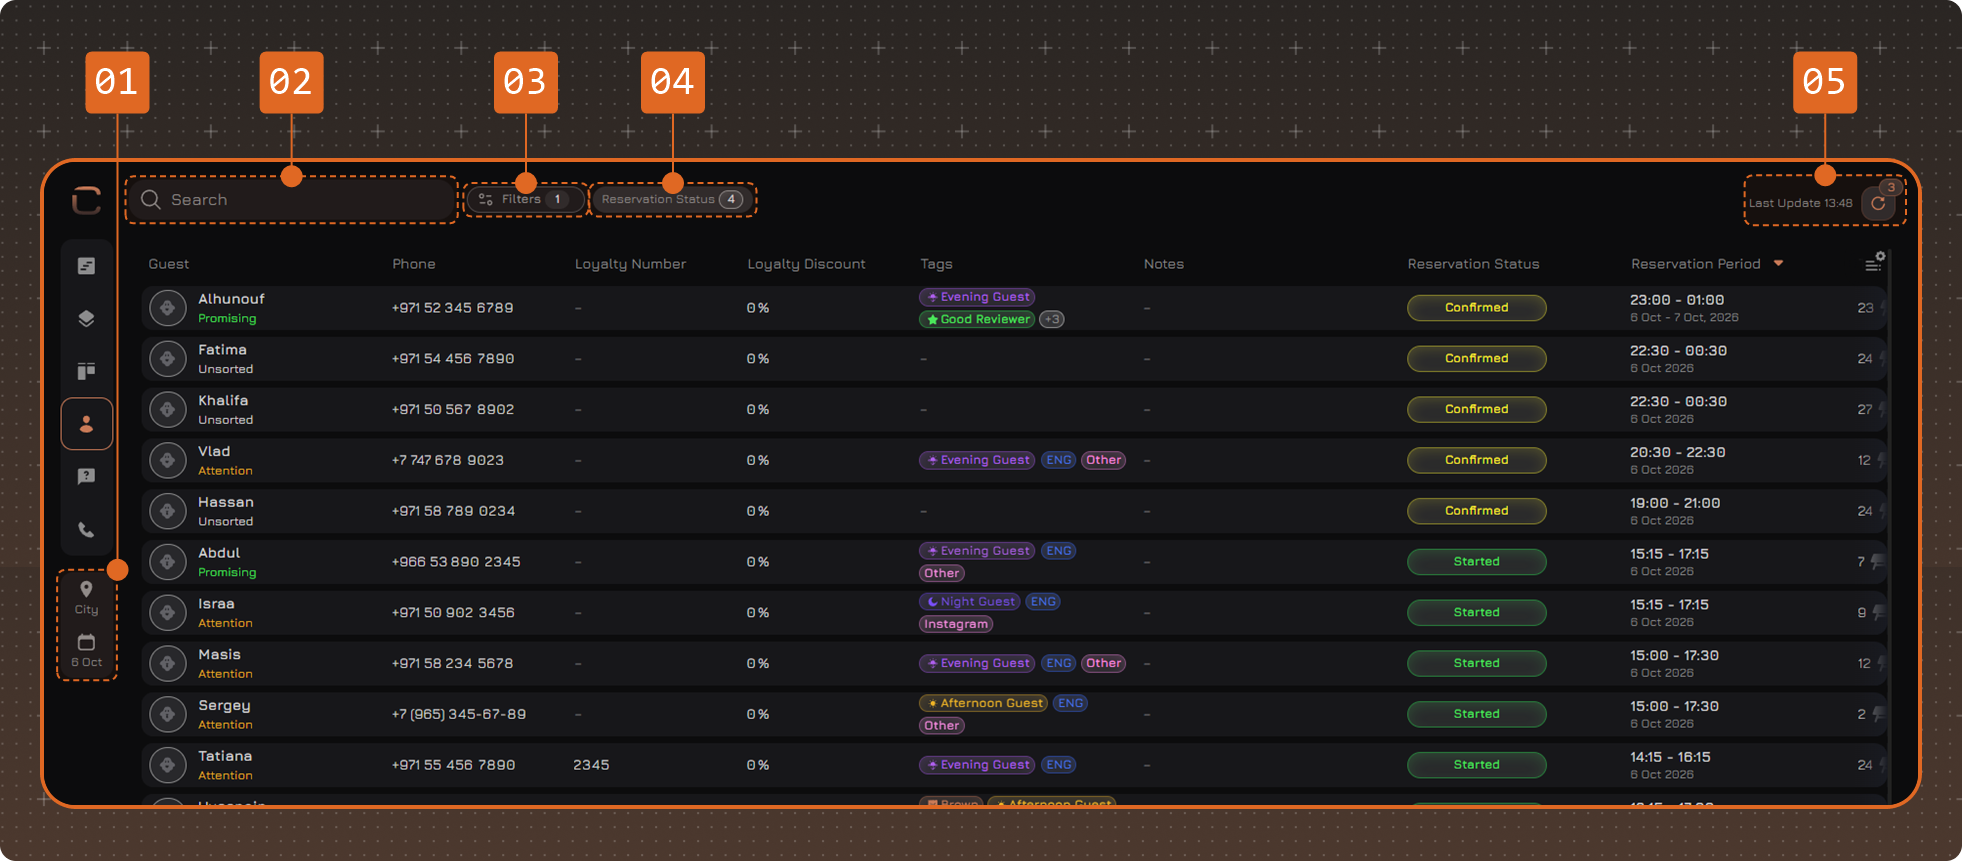
- Location and date — the list shows guests who have reservations at the selected location on the selected date.
- Search — by the guest's first name, last name, phone number and loyalty card number.
- Filters
- Reservation Status — a quick filter by reservation status.
- Last Update — the time of the last data update and the refresh button.
By default, the table is sorted by the Reservation Period column — from later reservations to earlier ones.
Reservation Status
Click Reservation Status, check the required statuses and click Apply. The list will show only the guests who have reservations in the selected statuses.
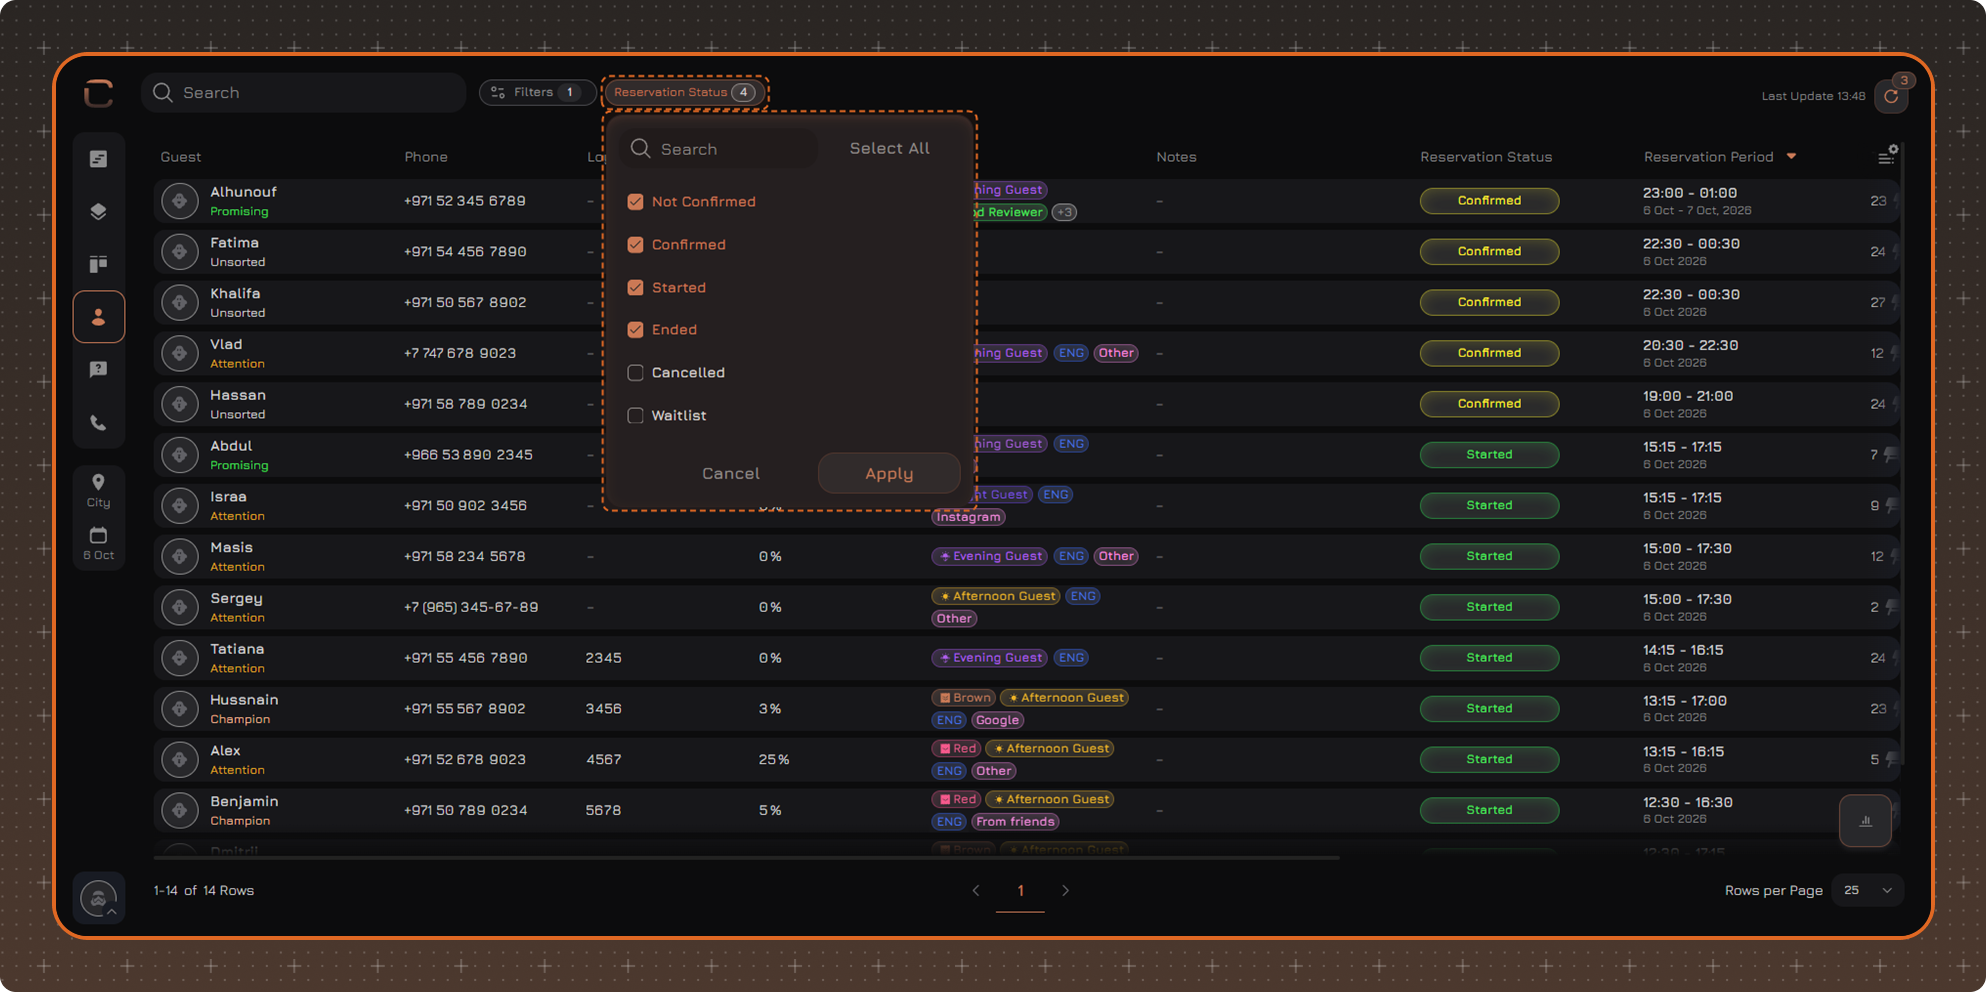
By default, the Not Confirmed, Confirmed, Started and Ended statuses are selected. To see guests with cancelled reservations or guests on the waitlist, check the Cancelled and Waitlist statuses.
Statistics
Statistics on guests and reservations for the selected day are displayed in the lower-right corner of the table. They have two tabs: Active and Cancelled.
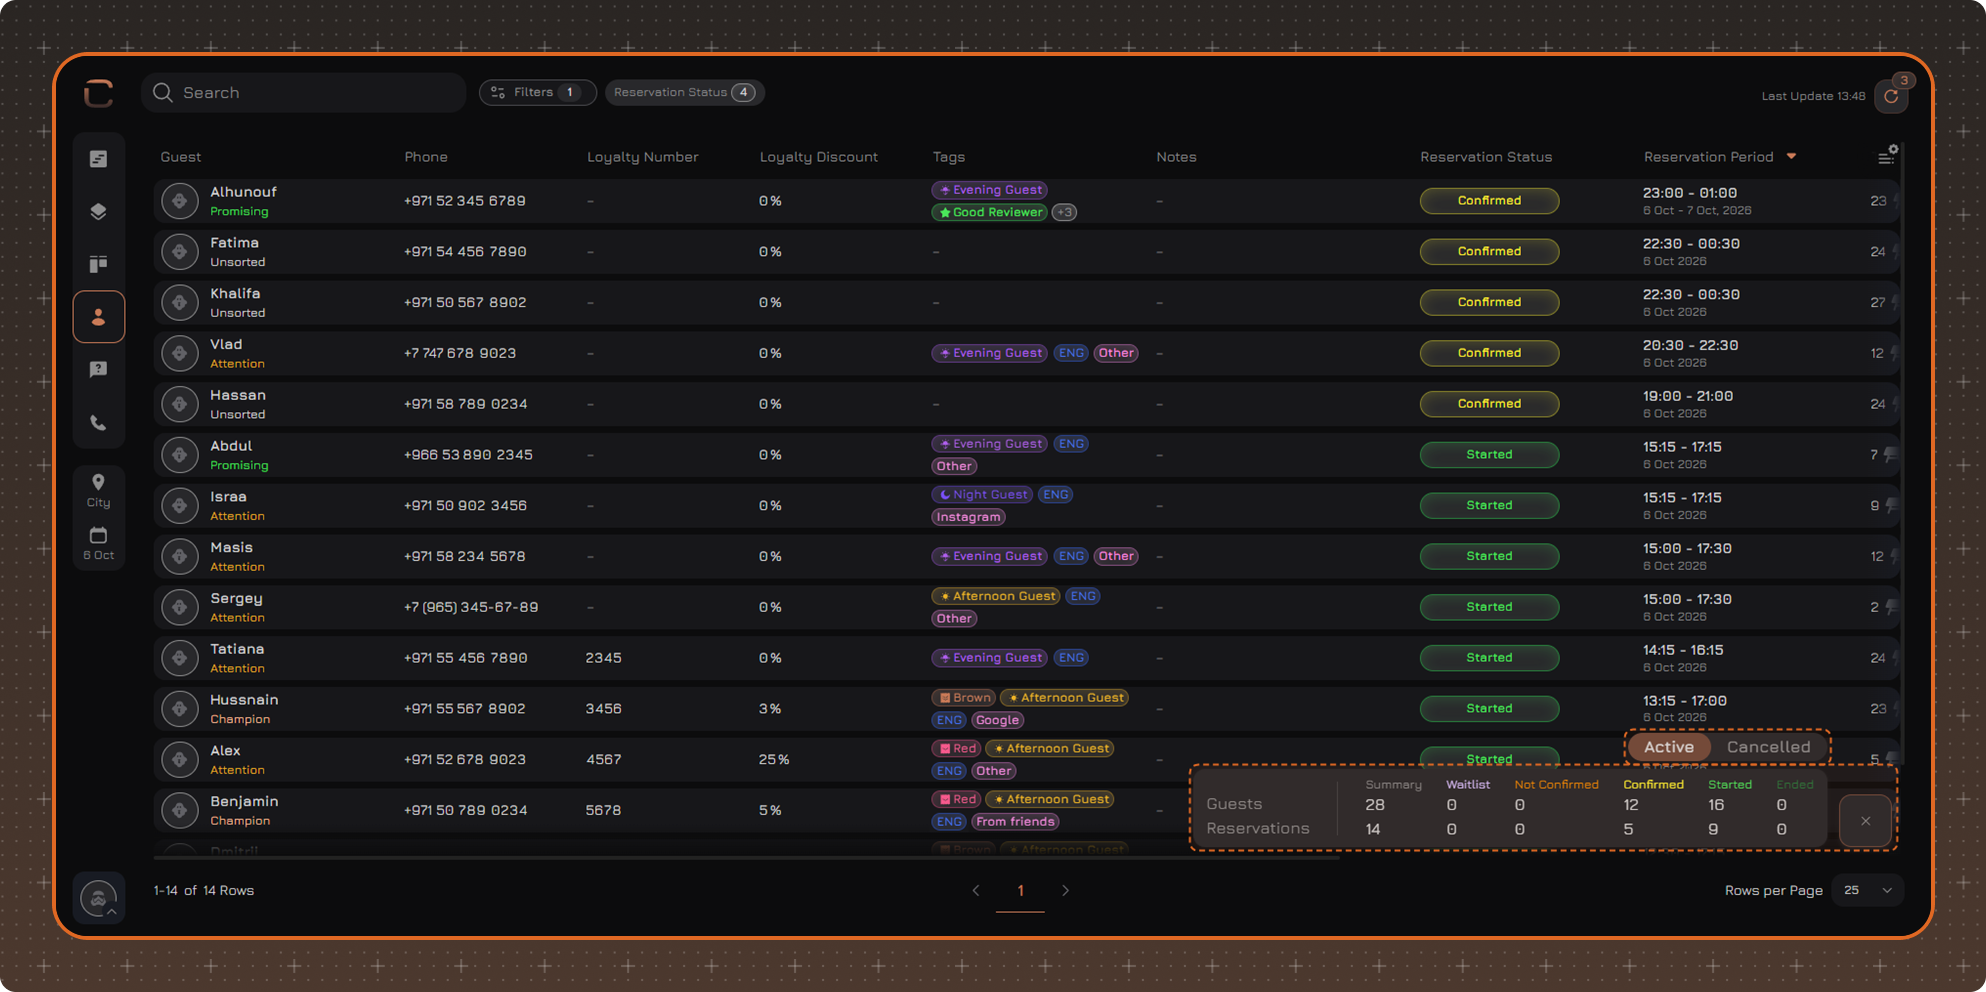
On the Active tab, the total number and the number in each status are displayed for guests and reservations: Waitlist, Not Confirmed, Confirmed, Started, Ended.
On the Cancelled tab, the data is grouped by cancellation reason.
The Guests row shows the number of guests in the reservations, while the Reservations row shows the number of reservations.
Table Settings
To change the displayed columns, click the table settings button in the upper-right corner.
In the panel that opens, you can:
✔ Select the columns to display
✔ Change the column order — drag a column in the list by the icon to the left of its name
✔ Pin the required columns — click the pin icon to the right of the column name. Pinned columns move to the beginning of the table
✔ Restore the default settings using Reset to Default
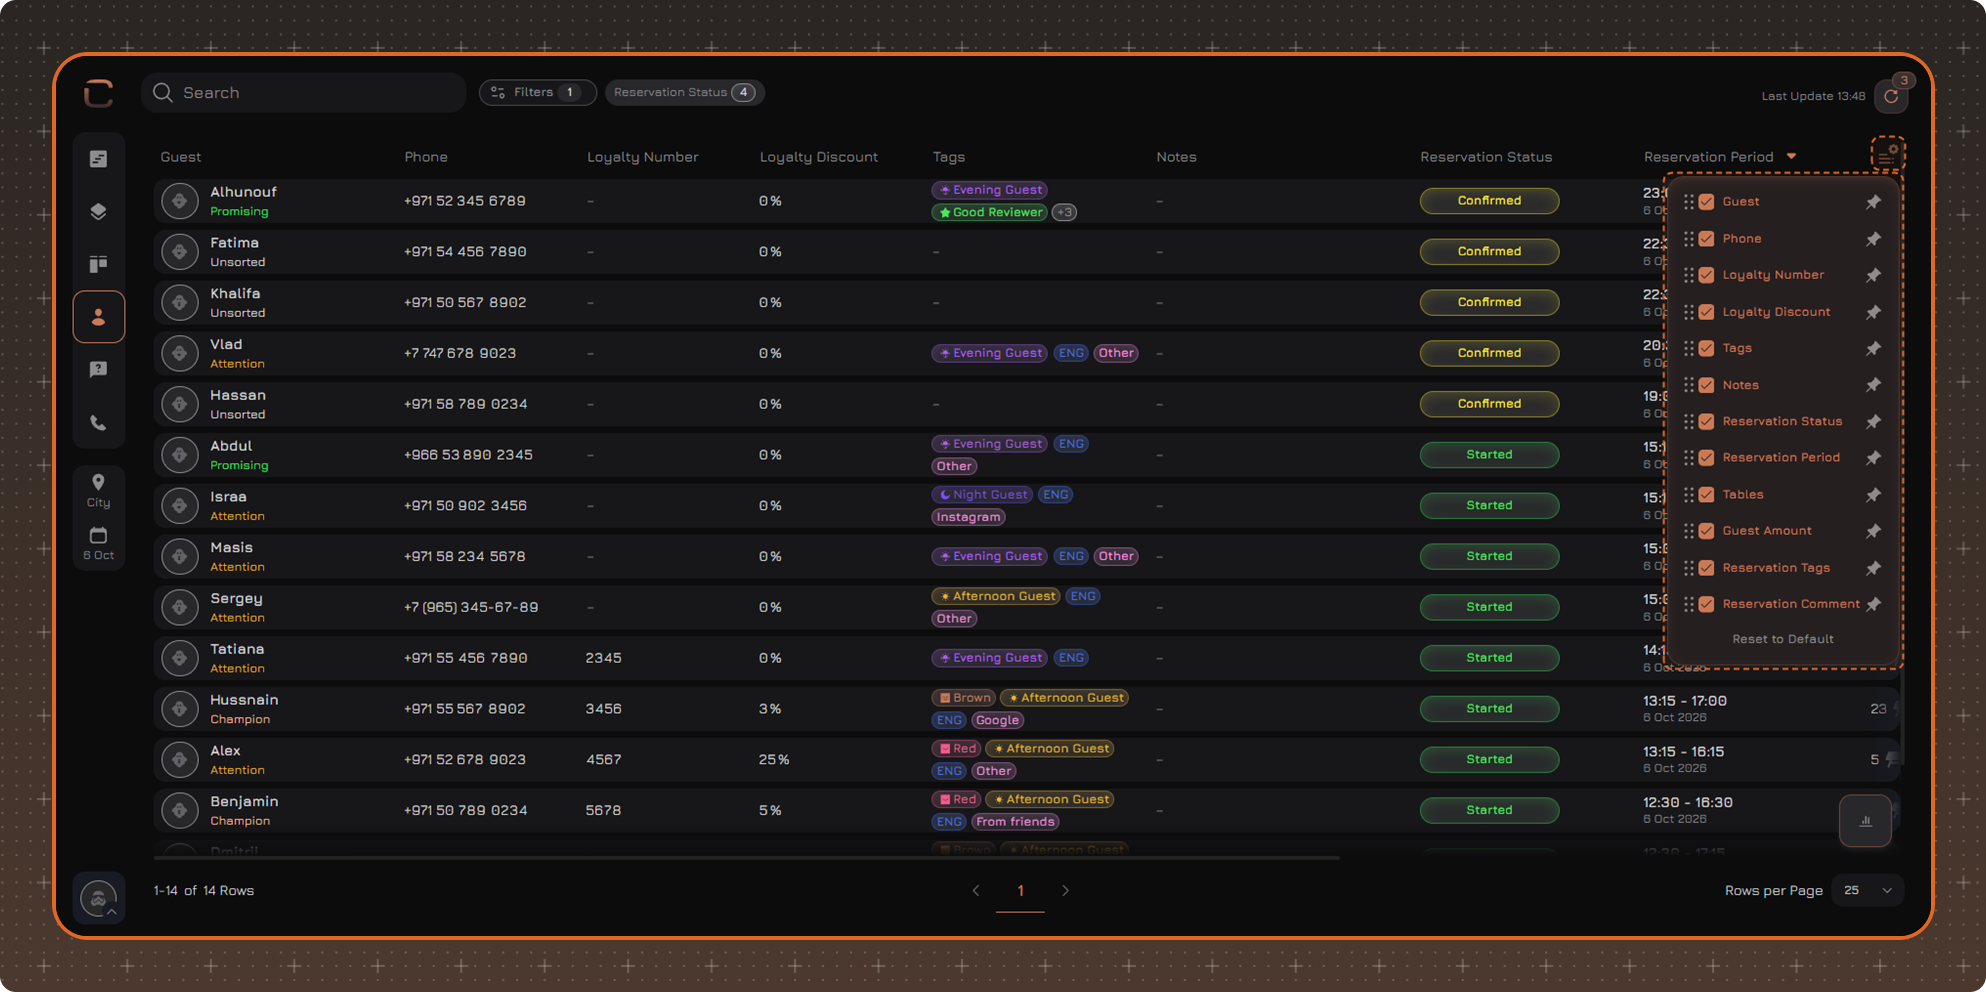
By default, the table displays the following columns:
- Guest — the guest's name and RFM segment
- Phone
- Loyalty Number
- Loyalty Discount — the guest's discount under the loyalty program
- Tags — guest tags
- Notes — guest notes
- Reservation Status — the status of the guest's nearest reservation that matches the filters
- Reservation Period — the start and end time of this reservation
- Tables
- Guest Amount
- Reservation Tags — for more information, read the article Reservation Tags
- Reservation Comment
Guest Sidebar
Click a guest row to open the Guest Reservations sidebar. The upper part of the sidebar shows the guest's name, phone number and tags, and below are the guest's reservations.
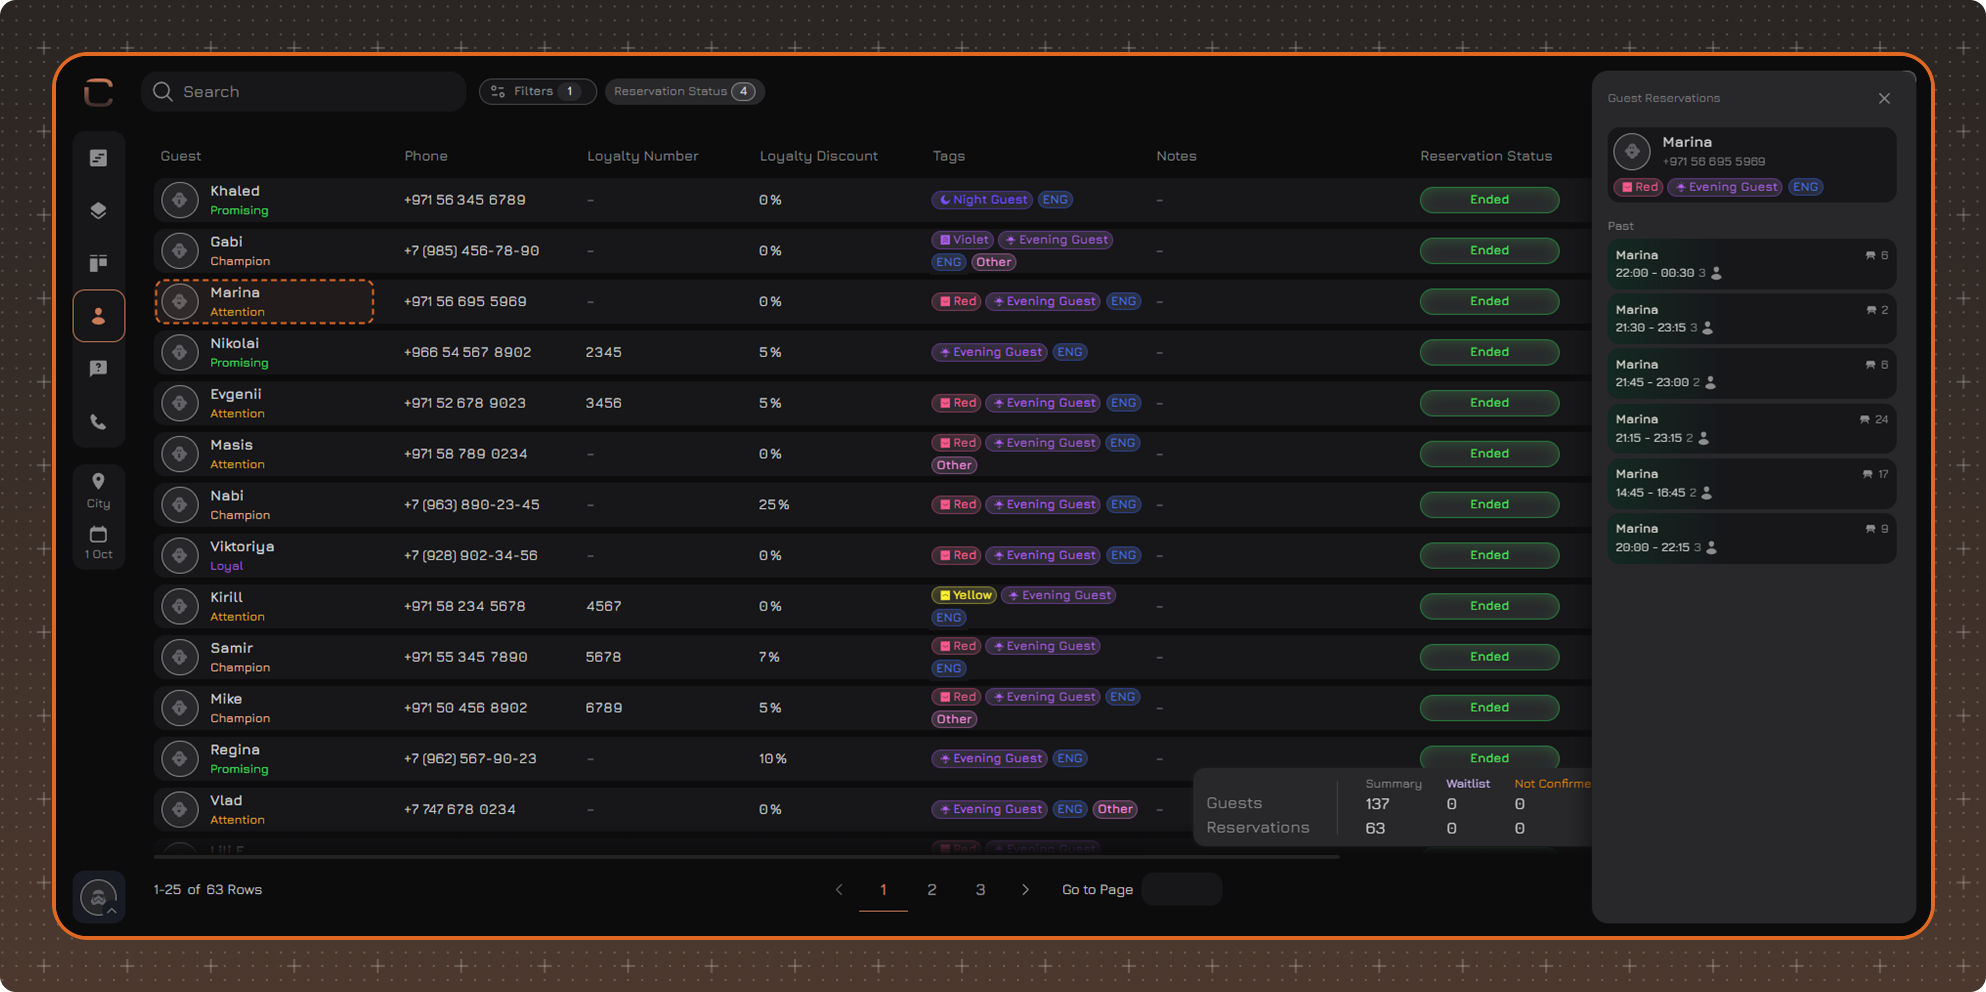
Reservations in the sidebar are divided into groups:
- Upcoming — reservations in the Confirmed, Not Confirmed and Waitlist statuses;
- Current — reservations in the Started status;
- Past — reservations in the Ended and Cancelled statuses, no more than the last 10.
To open a reservation, click it in the list.
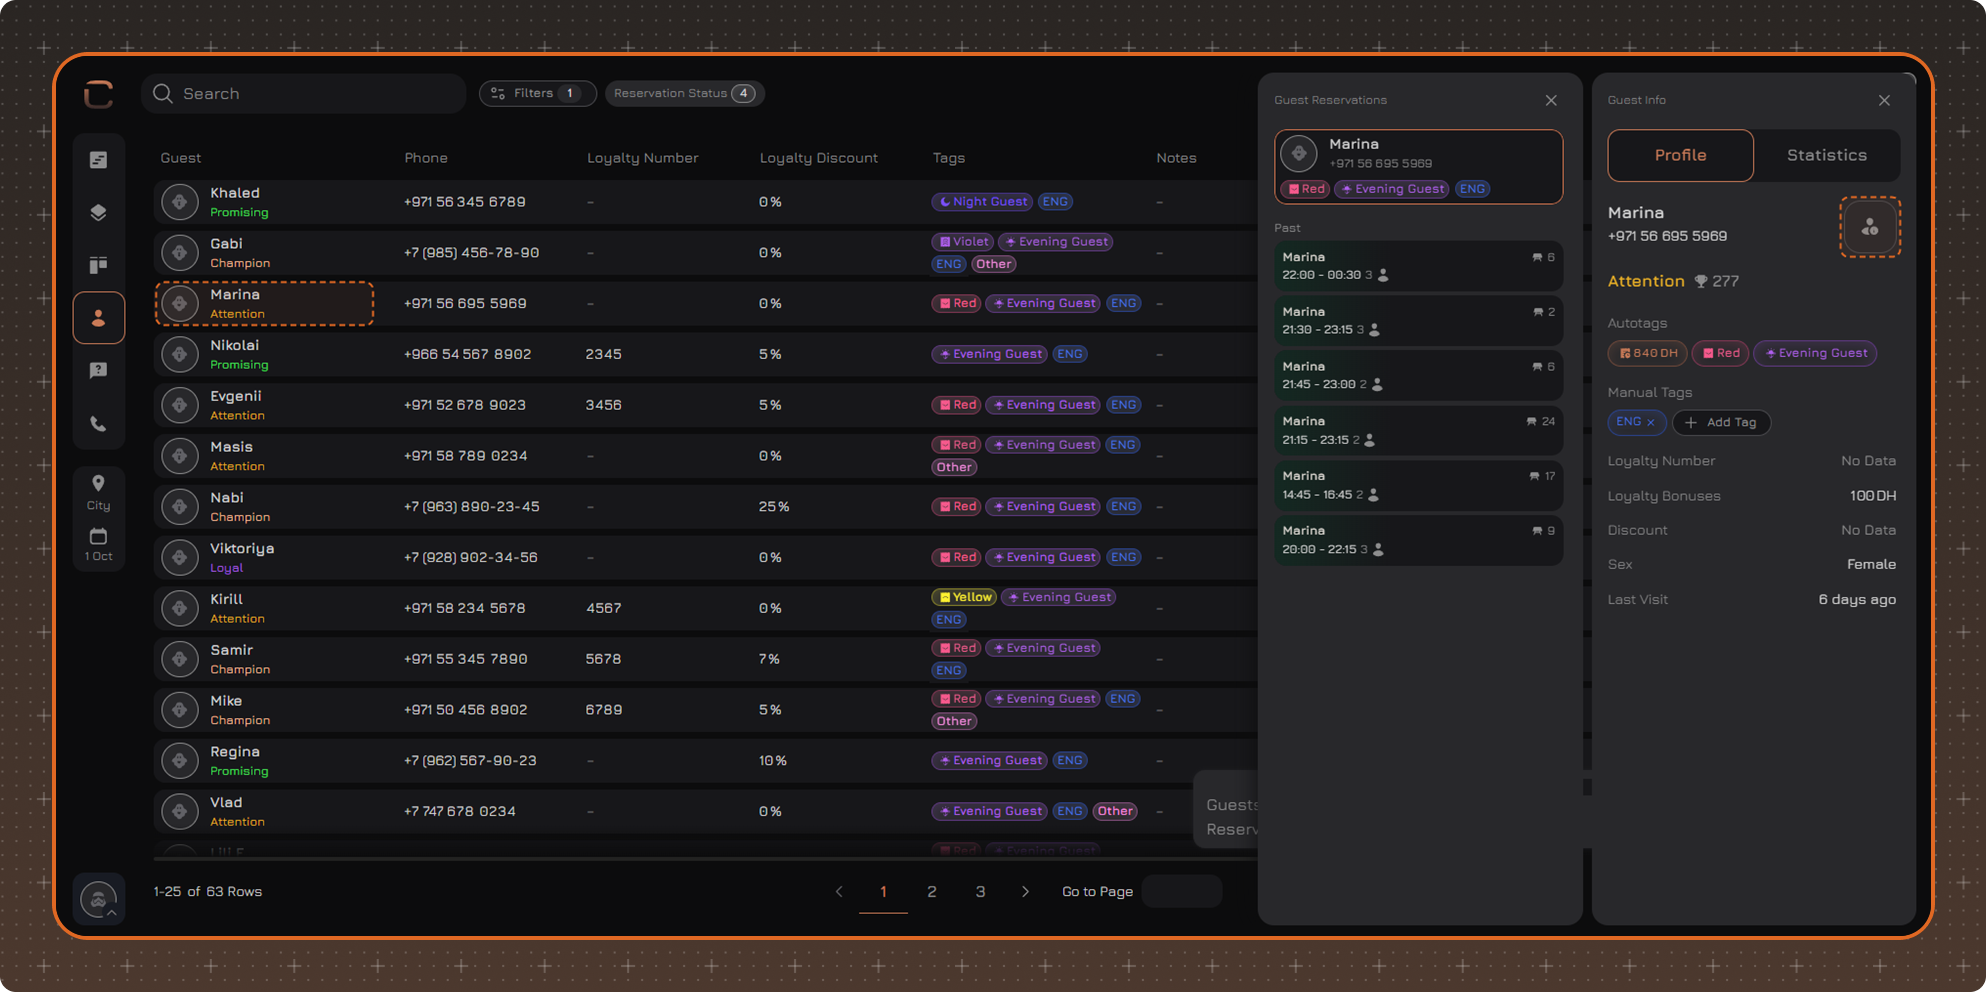
To open the Guest Info sidebar, click the block with the guest's name. It has two tabs:
- Profile — the guest's RFM segment, autotags and manual tags, loyalty number, loyalty bonuses, discount, sex and last visit. You can also add a manual tag to the guest here;
- Statistics — the guest's visit statistics.
The button with the guest icon in the upper-right corner of the Guest Info sidebar opens the guest card in the main Cosmos system.