

Mailings
Mailings help maintain communication with guests: inform them about news and offers, bring guests back, remind them about the venue, and send service messages.
Mailings
The Mailings section is used to send messages to guests via SMS, Push, E-mail, and WhatsApp.
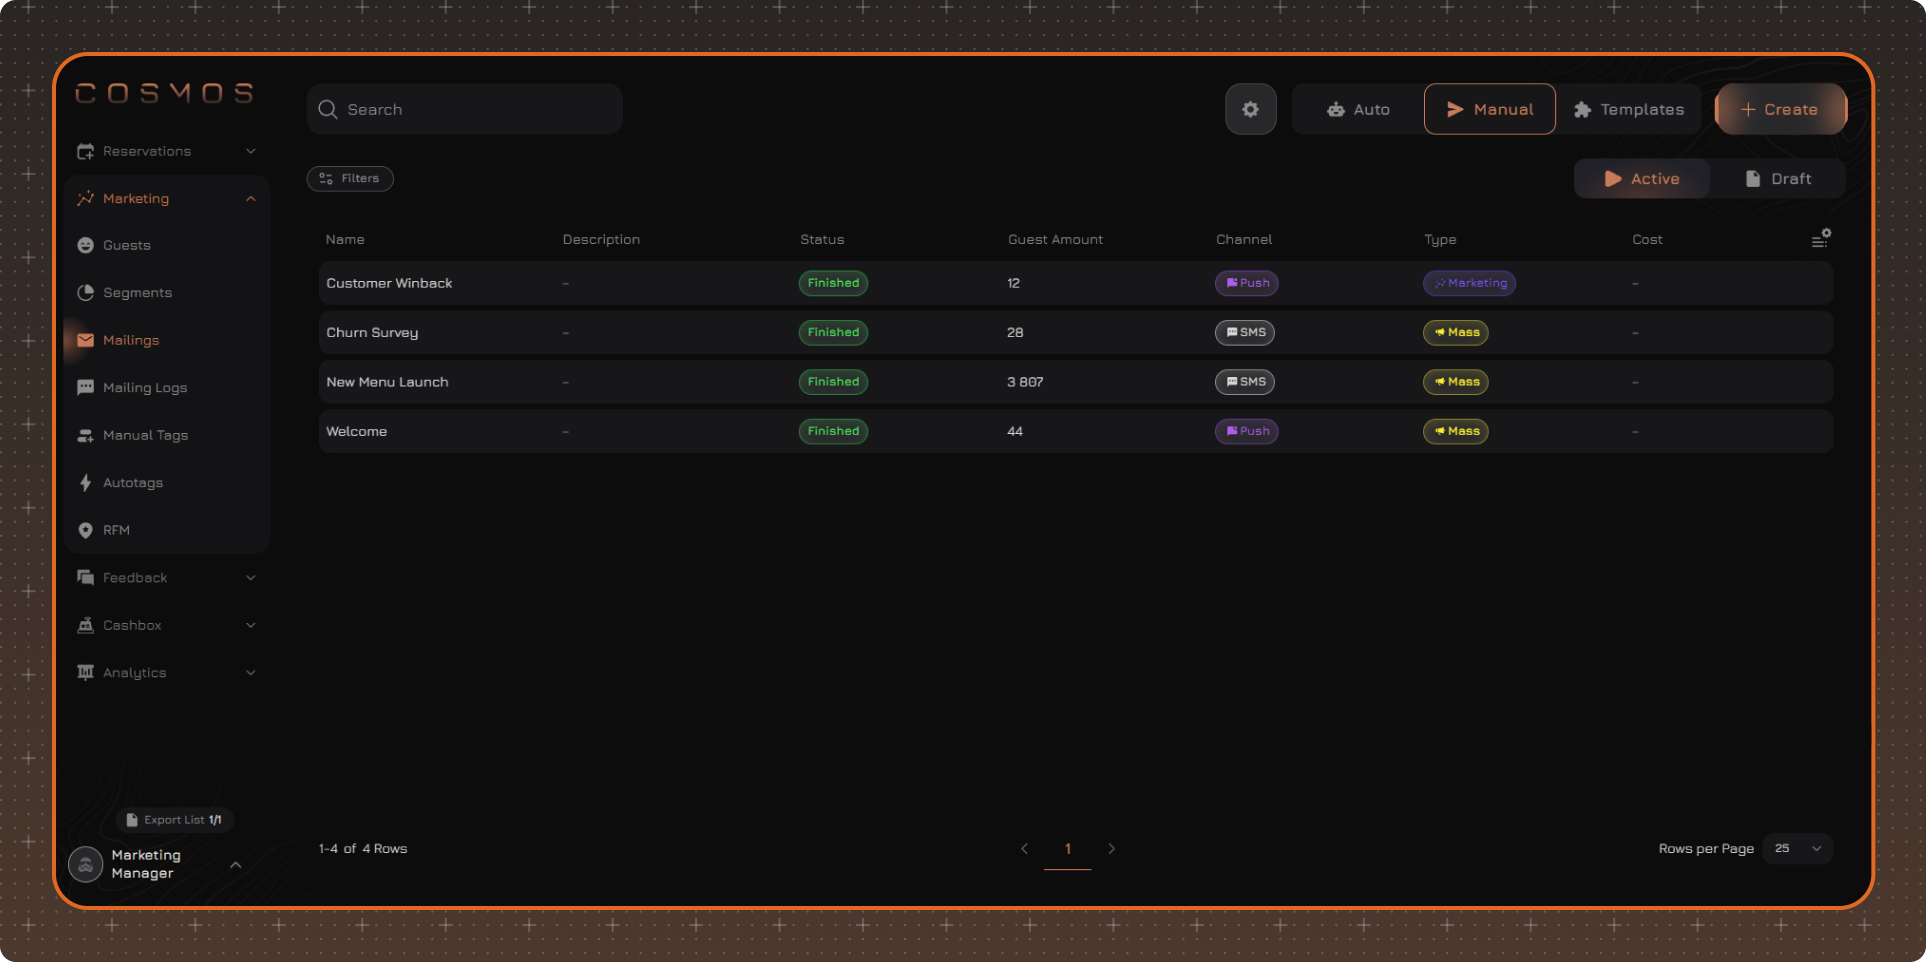
There are two types of mailings:
- Auto — sent automatically when a specified event occurs. For example, when a guest enters a segment, registers in the loyalty program, or a check is closed
- Manual — launched by a user for a selected audience
For each mailing, you can configure the audience, sending channel and message content, limits, sending time, and other parameters.
The history and statuses of sent messages are available in the Mailing Log.
Use the Auto / Manual switch to move between mailing types. Use the Active / Draft tabs to view active and saved mailings.
To find a mailing, use the Search field.
To create a new mailing, click Create.
Instructions for creating mailings:
Integrations
Each sending channel in Mailings works through the corresponding integration:
- SMS — through an SMS gateway
- E-mail — through an E-mail service
- Push — through an integration with the loyalty card system
- WhatsApp — through an integration with Twilio
If the required sending channel is not displayed when creating a mailing, check that the corresponding integration is available and configured.
WhatsApp Templates
Only templates approved by Meta can be used to send messages via WhatsApp.
To create and manage templates, click Templates at the top of the Mailings page.
For more information about working with templates, see Templates.
Setting Limits
To configure general limits on the number of messages sent to each guest, click the gear icon in the upper-right corner.
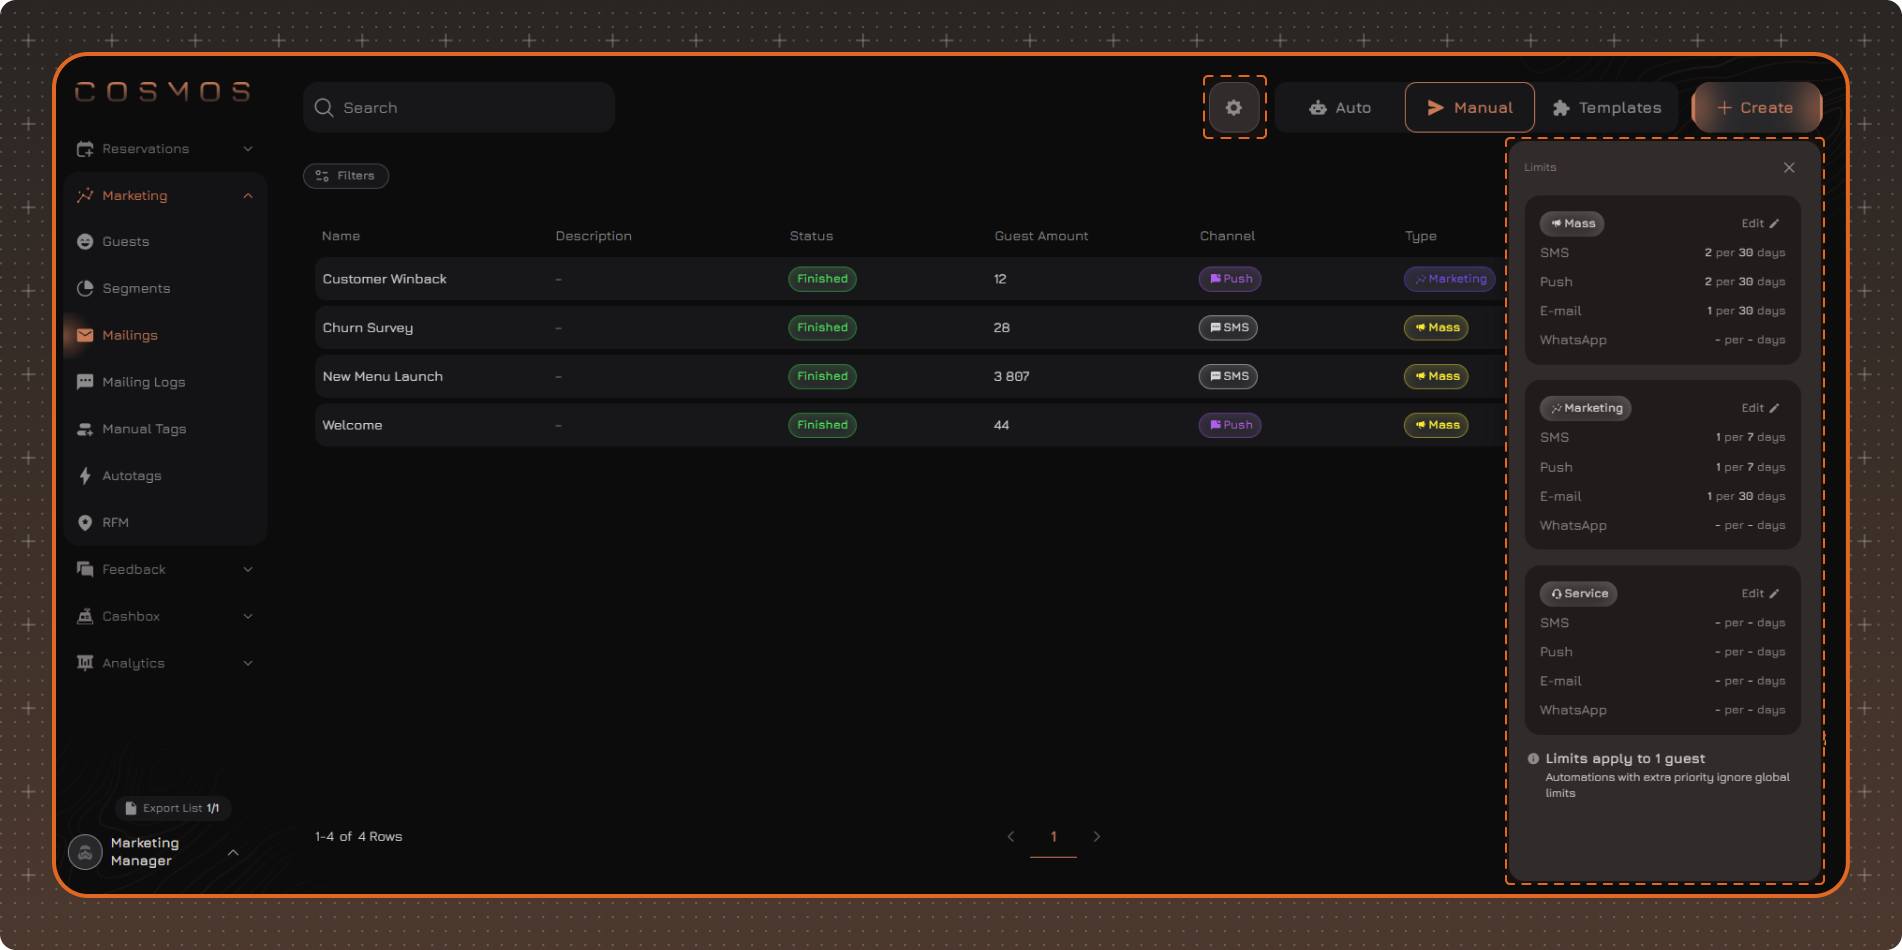
- Limits are configured separately for each mailing type: Mass, Marketing, and Service
- For each type, limits can be configured separately for SMS, Push, E-mail, and WhatsApp
- A limit specifies the maximum number of messages that can be sent during the selected period
- If individual limits are configured for a specific mailing, the general limits are applied first, followed by the mailing's own limits
- Mailings with Extra Priority are sent without taking the general limits into account
Table Settings
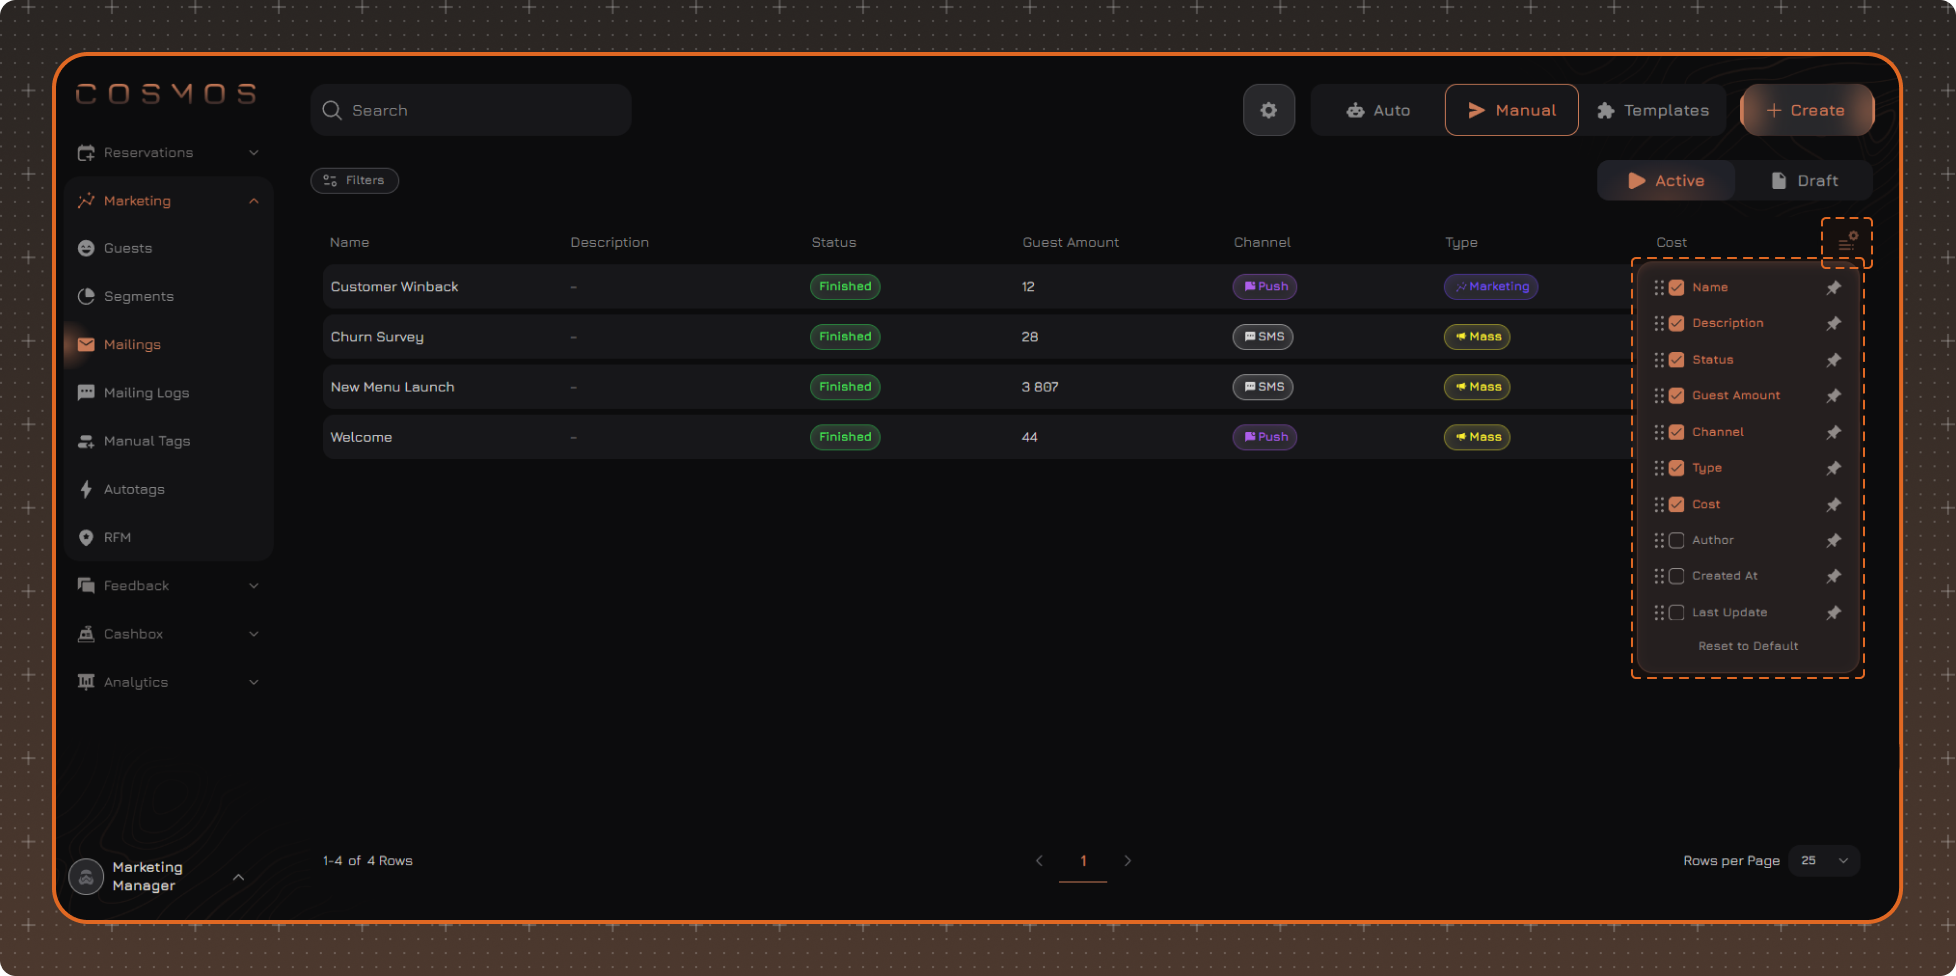
To change the displayed columns, click the table settings button in the upper-right corner.
In the panel that opens, you can:
✔ Select the columns to display
✔ Change the column order — drag a column in the list by the icon to the left of its name
✔ Pin the required columns — click the pin icon to the right of the column name. Pinned columns move to the beginning of the table
✔ Restore the default settings using Reset to Default
The mailing table contains the following columns:
- Name
- Description
- Status — the current status of the mailing. An Auto mailing can be Active or On pause, while a Manual mailing can be In progress or Finished. Draft mailings do not have a status
- Type — Mass, Marketing, or Service
- Channel — the channel used to send the message
- Locations & Groups
- Created At
- Author
- Last Update
For Auto mailings only:
- Limits — individual mailing limits in the format
N times per N days to 1 guest. If no limits are configured, a dash is displayed
For Manual mailings only:
- Guest Amount — the number of guests selected based on the mailing conditions at the time the mailing is launched
Note. Table settings are saved after the page is refreshed. The settings are reset after you log out.
Data Filtering
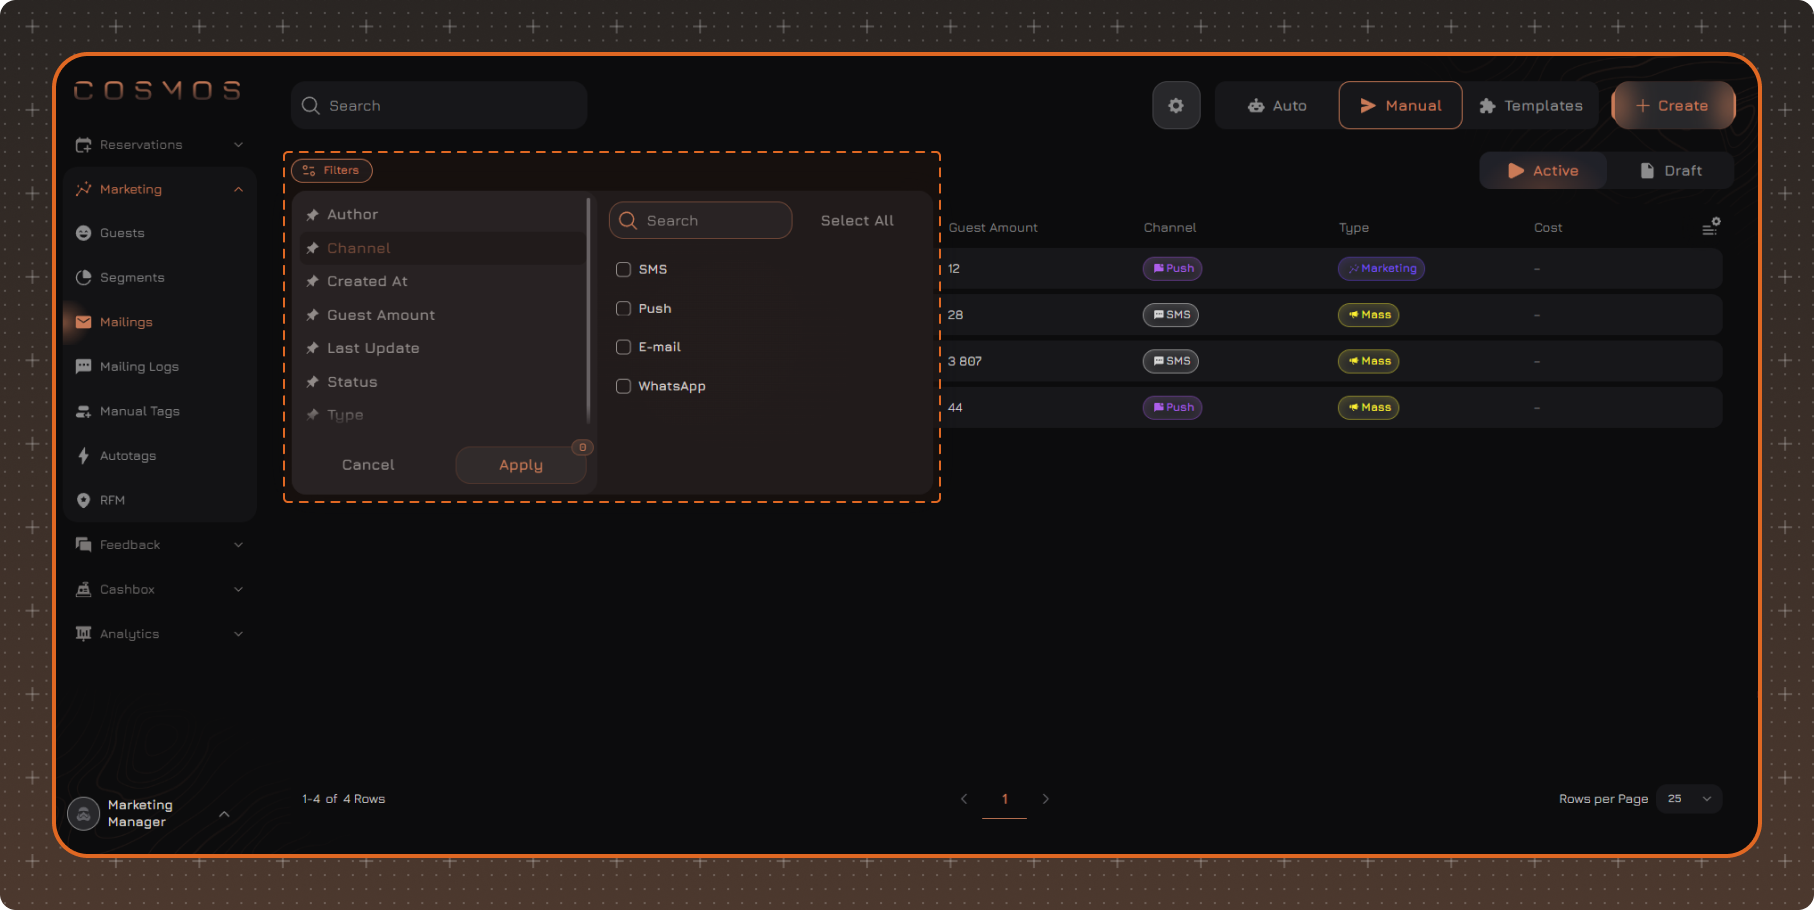
If necessary, click Filters to set additional filtering conditions.
After selecting the required values, click Apply.
Applied filters are displayed above the table. To remove an individual filter, click × next to its name. To reset all filters, click Clear Filters.